Thursday, May 28, 2020

Recipe Notes: Gingersnaps

19 May 2020

Recipe from The Perfect Cookie, America's Test Kitchen, 2017, p. 46; also available online


I have had store-bought gingersnaps a few times but not many home-made gingersnaps. I recall my daughter making this recipe once some years back. The closest I have made would be spice cookies, and I have made (and written about) several of those. As I slowly work my way through this cookbook I came to this recipe and knew it was time to try it out.


My rule of thumb for the time to make a batch of cookies is 60-90 minutes. This recipe takes longer because the dough rests in the refrigerator for an hour and because it makes more, smaller cookies. Flour, baking soda, and salt were whisked together in a small bowl. Butter was melted in a skillet and cooked until it just started to turn brown. It was poured into a large bowl to which ground ginger, cinnamon, cloves, pepper, and cayenne were added.  After a few minutes to cool, brown sugar, grated fresh ginger, and molasses were whisked into the butter mixture followed by egg and egg yolk. The flour mixture was stirred in, the bowl was covered, and refrigerated for about an hour. The dough was formed into balls, each 1 heaping teaspoon. These were rolled in granulated sugar and baked for about 25 minutes. I made 60 cookies (recipe yield is 80). With 50 minutes to make the dough, an hour to chill, and 70 minutes to shape and bake: three hours total time. 


These are good cookies. They are crispy with a good snap but are not teeth-shattering hard. This is true for both fresh cookies and after a few days. They freeze well. I would not have been surprised if they were a little soft as mine were larger than envisioned by the recipe writers. (Just how much is a "heaping teaspoon"?) They have good ginger flavor and a bit of late heat, probably from the peppers, but there was not too much spice even for my sensitive, heat-averse taste. These are worth making again.

Monday, May 25, 2020

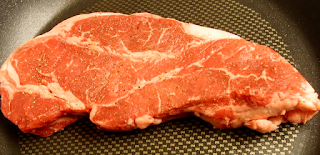
Recipe Notes: Pan-seared Strip Steaks

12 May 2020

Recipe from Cook's Illustrated, March 2020


I have had mixed success cooking steak and have written about my trials and tribulations here several times. There have been enough challenges that I have shied away from cooking steak, either because the end result was poor or the mess and alarm, as in smoke alarm, didn't seem to justify the experience. A new technique in a recent Cook's Illustrated seemed to promise to solve these problems. Does it live up to its promise?


This new school method for cooking steak breaks with much conventional steak-searing convention. I started with a one-pound strip steak that was about 1¼-inches thick. The steak was patted dry, seasoned with pepper, and placed in a cold nonstick skillet, with no oil. The burner was turned on high. After two minutes the steak was flipped and cooked for another two minutes then flipped again. The heat was reduced to medium and the steak cooked, flipping every two minutes. A total of five flips was needed before the temperature of the steak reached 120°. After resting the steak was seasoned with salt and served. Total time was 15 minutes.


You're probably wondering, is that all there is to it? This method led to perfectly cooked steak with a good crust and medium-rare interior from edge to edge. Clean up was easy with the non-stick skillet and there was no splatter and no blaring smoke alarm. This technique removes any reasons I might have to not cook steaks, other than the cost of a quality cut of steak. As an option, the recipe suggests seasoning the steaks with salt and letting them rest for 45 minutes to 24 hours in advance and I might try that next time I have a hankering for a strip or rib-eye steak.

Friday, May 22, 2020

Recipe Notes: Spanish Potatoes with Olive Oil and Wine

8 May 2020

Recipe from Cook's Illustrated, September 2019; also available online


I grew up in a meat and potatoes household. Lately we haven't been eating potatoes as regularly as some times in the past, though this is not by design but rather a consequence of our meal choices. (As examples, who eats potatoes with tacos or with pizza?) Being able to add a new way to prepare potatoes is an enticing possibility that tempted me when I read about this recipe in Cook's Illustrated last Fall.


Two and a half pounds of Yukon Gold potatoes were peeled and sliced ¼-inch thick. The slices were stirred with &frac13.-cup olive oil, kosher salt, pepper, thinly sliced onion, and minced garlic. The potato mixture was put into a 13x9-inch baking dish, covered tightly with foil, and baked until the potatoes were tender, about 35 minutes. Dry white wine was added, the foil was placed loosely on the baking dish, and the potatoes were returned to the oven for about 20 minutes. Total time, much of which was hands-off, was about 90 minutes. 


The potatoes, which do not brown at all, were good. As described in the article, they were tender, smooth, and velvety with nice flavors from the wine. They worked well left over with reheating in the microwave. They were too salty for us but that could be easily remedied. Though these were good I don't think they were so good that I would make them on a regular basis when we have potatoes.

Sunday, May 17, 2020

Recipe Notes: Make-ahead Mayonnaise

1 May 2020

Recipe from Cook's Illustrated, March 2020; recipe also available online


I don't eat mayonnaise, except occasionally on a BLT. Nonetheless I've long wanted to try my hand at making it myself. Diane does eat it, though more when she is working than when sheltering in place due to a pandemic. This recipe from a recent Cook's Illustrated is designed to create a mayonnaise that keeps well, so there is no good excuse to prevent me from learning how to make my own.


Water, egg yolks, and lemon juice (bottled) were stirred together. The mixture was microwaved, with frequent stirring, until its temperature is between 160° and 165°; in my case it was a little warmer. (This pasteurizes the eggs so the mayo will keep well.) Vegetable oil, salt, Dijon mustard, and sugar were whisked into the warm egg mixture then strained into the food processor. With the food processor running, vegetable oil was drizzled into the egg mixture. Adding 1¼ cups over the course of 2 minutes tests the cook's patience. The mixture is then scraped down, processed for another 5 second, and it's done. The entire process took about 20 minutes.


The mayo turned out very well. It looked like mayonnaise and Diane testified that it tasted like mayonnaise, too. It seems to be keeping well, though I don't think anyone has looked at it recently. I don't know that I would make it again, but if Diane likes it then I would be happy to do so. It was fun to make and interesting to see how a common ingredient, usually store-bought, can be made at home.

Thursday, May 14, 2020

Recipe Notes: Chicken Schnitzel

30 April 2020

Recipe from Cook's Illustrated, March 2020; recipe ("for two") is available online


Schnitzel is just meat, pounded thin, breaded, and fried in oil. This is not the first breaded/fried chicken cutlet we have tried. Since we have enjoyed other versions of fried chicken cutlets it seemed worth trying this one. It is characterized by a cutlet with a fine, wrinkly crust that puffs away from the chicken during frying. Could this replace other versions of this dish in our repertoire?


Three shallow pans were set up to bread the chicken: flour, egg beaten with vegetable oil, and bread crumbs. A boneless, skinless chicken breast was halved horizontally then pounded into a uniform thickness of about ¼ inch. Each cutlet was seasoned with ⅛ teaspoon pepper and ½ teaspoon kosher salt. (The directions were to season both sides of the cutlet, I seasoned just one side.) Each cutlet was dredged in flour, coated first with the egg mixture, then with bread crumbs, and set on a wire rack to dry. Two cups of vegetable oil was heated in a Dutch oven to 350°. Two cutlets were placed in the hot oil and the pot was shaken continuously until the cutlets were wrinkled and light golden brown. Total time to prepare this dish was just 40 minutes.


The chicken coating was very good with a great crunch and the chicken was tender and juicy. However, it was much too salty even though I used only half as much salt as specified in the recipe. We had leftovers which were reheated in a skillet. These were good, too, though not as crunchy on the outside or as juicy on the inside as the original serving. This was a very quick recipe to execute, however the logistics and cleanup were a little daunting especially for just two people. The setup included a sheet pan/cooling rack for the raw cutlets, three shallow dishes with the ingredients for coating, and a second sheet pan/cooling rack for the breaded chicken. My kitchen does not have the room to conveniently set up such an assembly line. Then when you're done there are two cups of oil that need to be discarded. This would be a good dish to prepare for a larger group of people but the set up and clean up were a little too much for a dinner for two.

Saturday, May 9, 2020

Recipe Notes: Thin Crust Pizza

28 April to 2 May 2020

Recipe from Bread Illustrated, America's Test Kitchen, 2016, p. 180; recipe also available online


I've been wanting to make this basic, thin-crust pizza for some time and I have finally done it! Our daughter made this for us once but I have never made it myself. The recipe for this New York style thin-crust pizza was shared on the America's Test Kitchen TV show in 2012. Since the crust is my favorite part of most any pizza I have been somewhat reluctant to try a New York style pizza. I have memories of NY style pizza from a pizzeria, probably in Central New York, where the crust was so thin and crispy it was more of a cracker than a bread. Is that what I would end up with using this recipe? (This is on the America's Test Kitchen list of Top 20 recipes.)


Planning ahead was required to make this pizza as the dough was cold fermented in the refrigerator for several days, 1-3 according to the recipe. Making the dough was quickly accomplished in a food processor. Bread flour, yeast, and sugar were pulsed to combine the ingredients. Ice water was slowly added with the processor running then the dough was allowed to rest for 10 minutes. Oil and salt were added and combined with the dough in the processor. The dough was shaped into a ball, put into a covered bowl, and left in the refrigerator to ferment. It took about 25 minutes to make the dough.

The recipe asks that the dough ferment for at least 24 hours or up to 3 days. After 24 hours I took out half the dough and returned the other half to the refrigerator to continue fermenting. The dough was shaped into a 4-inch round, covered, and left on the kitchen counter for 1 hour. During this time tomato sauce was made by processing canned whole tomatoes, olive oil, garlic, red wine vinegar, dried oregano, salt, and pepper until smooth. Fresh mozzarella was grated, after being chilled in the freezer, and Parmesan was grated. Meanwhile, a pizza stone was heated on the top rack of the oven and at 500° for an hour. At the end of the hour it was heated even more under the broiler for about 10 minutes, then the oven temperature was set back to 500°. When the dough was ready it was stretched into a 12-inch circle, covered with sauce, Parmesan, and mozzarella. It was baked (using an inverted sheet pan with parchment paper as a peel) on the stone until done. These steps, including letting the dough warm and heating the oven, took 85 minutes.


The second half of the dough was used 4 days after it was made. Sauce and grated cheeses had been saved from the first bake. Again it took about 85 minutes to prepare and bake the pizza.

The pizza was really good! The crust was crispy on the outside and chewy and flavorful on the inside. It was not anything like a cracker and I now suspect that sadly remembered pizza came from a pizzeria that didn't really know their stuff. Since making the pizza I have learned that 72 hours is the best resting time for the dough. Less time and the dough is not relaxed so is hard to stretch into a large circle. Longer than that and it is too relaxed and too easily tears. My experience at 24 and 96 hours is consistent with these observations. Each pizza served the two of us for one dinner and two lunches. Next time I will try to get higher-quality canned tomatoes for the sauce. The brand I purchased, Cento, had a lot of sauce and not so many tomatoes and I had to use ½-cup of the  canning liquid to make up the desired volume of sauce. I enjoyed making the pizza, the dough is fun to work with and it was satisfying to make this pizza at home.