Monday, May 15, 2023

Deluxe Blueberry Pancakes

 2 October 2022

Recipe from Cook's Illustrated, July 2022


For us, having breakfast for dinner usually means eggs, bacon or sausage, and hash browns. But once in a while we will have French toast, waffles, or pancakes, also served with bacon or sausage. And a mimosa, a staple when having breakfast for dinner. French toast, waffles, and pancake leftovers can be frozen and had for my breakfast as a break from cereal. It had been a while since we had pancakes (French toast and waffles are both better as leftovers) so the appearance of this recipe provided a good reason to have some pancakes, especially since they incorporated fresh blueberries.


The pancakes were easy to make. The dry ingredients—AP flour, malted milk powder, sugar, baking powder, baking soda, and salt—were whisked together in a bowl. The liquid ingredients—buttermilk, egg, and melted butter—were whisked together in a separate bowl or measuring cup. The liquid ingredients were next whisked into the dry ingredients until just combined and fresh blueberries were folded into the batter. Pancakes were cooked in a griddle that had been coated with butter. They were portioned using a #16 scoop. The electric griddle was set to 325° as specified in the recipe but this turned out to be too cool and eventually it was set to 425°. Total time to make a dozen pancakes was one hour.


These were very good pancakes, though the best part was the fresh blueberries. They were light and fluffy with good flavor. The leftovers, which were frozen and then reheated for breakfast, were not as light and fluffy as when fresh but they still taste good and still have the sweet pops of flavor provided by the blueberries. Diane suggested adding more berries to the recipe; this would be easy to do as the recipe calls for just under 1 pint, it would be easy to use a whole pint. I can't compare these pancakes with those made from scratch with other recipes. But I can say they are much better than pancakes made from a mix as I had some at a community event within a few days of having some made with this recipe.

Wednesday, May 10, 2023

Grandma Pizza

 3 October 2022

Recipe from Cook's Country, February 2012


Yet another pizza variety, though in this case it is not named for a city. It is a pan pizza from Long Island which gets its name from its humble, make-at-home origins. The thin dough is cooked on an oiled sheet pan and topped with mozzarella cheese with chunks of tomato on top. 


Olive oil was added to water in a measuring cup. This was slowly added to a mixture of bread flour, yeast, sugar, and salt in a stand mixer running on low speed. Once the ingredients were combined the speed was increased to medium low and the the dough mixed for about 10 minutes. This was placed on a half sheet pan that had been coated with olive oil and gently stretched into a rectangle approximately 10 by 6 inches. It was covered with plastic wrap and left to rise until doubled at which point it was gently stretched to the edges of the sheet pan. After rising until it was slightly puffed the toppings were added. First, a mixture of grated mozzarella and parmesan cheeses. Next a can of diced tomatoes that had been drained and mixed with olive oil, minced garlic, dried oregano, and salt. This was baked at 500° until browned and bubbling. It was sprinkled with chopped fresh basil and served. Total time, including rising, was about 3½ hours.


This was a good pizza. It has a nice, crisp crust with good flavor from the tomato chunks. It was easy to make as the pan helped with the shaping. The crust was a little too thin in places, so thin it had some holes in it, but in the end this wasn't really a problem as these mostly filled in when the dough rose the last time. It was important to spray the plastic wrap that is used during rising with oil to prevent it from sticking to the wet dough. One of the biggest advantages of this recipe is that the pizza that is easy to make in an afternoon. It provided two dinners for the two of us.

Tuesday, May 9, 2023

Salmon Piccata

 7 November 2022

Recipe from Cook's Country, April 2021


I've had chicken piccata in restaurants and even made it at home. The simple, bright sauce of lemon, capers, wine, and butter goes well with chicken and it seems like it would go well with salmon, too. We are able to buy individual portions of frozen salmon, and other fish, which are convenient to keep on hand.  Thus it is good to have a new recipe for the fish in the freezer. Our fillets aren't as thick as what is in the recipe and this may have an affect on the results.


This was almost two separate recipes: one for cooking the salmon and one for making the sauce. The skin was removed from two salmon fillets which were patted dry with paper towels and seasoned with salt and black pepper. Olive oil was heated in a 10-inch nonstick skillet on medium-high and the salmon was added skin-side down. It was covered and cooked until browned to an internal temperature of 125° without flipping the fish. The fish was transferred to a serving dish while the sauce was prepared in the same skillet. Sliced garlic was added and cooked until fragrant. AP Flour was added and cooked for 15 seconds. White wine, water, capers, lemon zest, lemon juice, salt, and pepper were whisked into the mixture. (Having these all ready before starting to cook is necessary.) The mixture was brought to a boil and cooked for 30 seconds. Off heat butter was whisked in and chopped parsley was added. (The recipe specifies fresh dill.) Total time was about 35 minutes.


The salmon and the sauce were both good, especially given how quickly this recipe comes together. Since our fillets were thinner than those in the recipe they will either be less brown if cooked to 125° or well browned and over-cooked. Using the no-flip method in this recipe they cook in under 5 minutes. Adding fresh dill sounds appealing but I judged it wasn't worth buying the fresh herb for just one or two meals.

As a side note on a side dish, we had beets which were cooked sous vide. This method produced nicely cooked beets with a minimum effort. The recipe we used included creation of a vinaigrette but because of dirt that came off of the beets during cooking we were not able to try it.

Saturday, May 6, 2023

Milk Chocolate Crémeux (Creamy) Tart

 11 September 2022

Recipe from Cook's Illustrated, March 2022


I've written about a couple of chocolate tarts in this blog and neither was particularly successful or easy to make. I have also tried several chocolate cream pie recipes and have found them to be easier to make. This recent recipe promises an easier to make, thinner crust: a cookie-like pâte sucrée shell. While I was a little dubious about a milk chocolate filling I gave it a try.


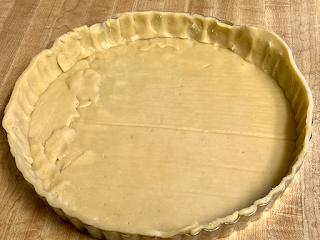
To make the crust, egg and vanilla were whisked together in a measuring cup. AP flour, sugar, and salt were pulsed in a food processor to mix them. Cold butter pieces were scattered over the flour mixture and processed so there were no visible pieces of butter. The egg mixture was added slowly to the flour mixture with the processor running. The soft dough was placed between two sheets of 12x16-inch parchment then pressed and rolled out to the edges of the parchment. (The recipe specified 12x18 which is an odd size that I do not keep around. The half sheet-pan size that I have worked fine.) This was transferred to a baking sheet and placed in the freezer for 30 minutes until firm. When the dough was removed from the freezer a  9-inch metal tart ring was used cut out a circle of dough. The remaining dough was cut into 1-inch strips. The dough circle was pressed into the tart pan to form the bottom and several of the 1-inch strips were used to fashion the sides. (The remaining dough was sprinkled with sugar and baked making a very nice, cookie like,  cook's treat.) The tart shell was frozen, the excess dough was cut from the sides, it was filled with pie weights, and baked at 350°.


For the filling half-and-half, egg yolks, cocoa, and salt were whisked together in a sauce pan and cooked over medium-low heat to 170°. Off heat, chopped chocolate (Hershey bars) and vanilla were whisked into the mixture followed by melted butter. The custard was strained and poured into the cooled tart shell. After the filling had cooled the tart was placed in the refrigerator.  Total time was about 4 hours but much of that was waiting for ingredients to freeze, cool, and chill.   

We both enjoyed the crust. It is both crisp and tender with a pleasant touch of sweetness. The cook's treats were a big hit with us, too. (I've made this twice, now, and overcooked the crust the first time so this is something to watch out for.) The filling, however, was too sweet and lacked chocolate flavor even with the addition of the optional cocoa powder. The crust is worth making again but with a different filling, perhaps one of the fillings from the chocolate cream pies that we like.