Monday, March 23, 2020

Recipe Notes: Cast Iron Pan Pizza

12 March 2020

Recipe from Cook's Illustrated, January 2020


A recent issue of Cook's Illustrated provided another opportunity for more experience with homemade pizza. This recipe is different in using a cast iron pan to bake the pizza. There is no rolling of the dough or sliding the pizza on and off of an oven stone, instead it cooks in a cast iron skillet. This allows you to make a thick, airy crust using a very wet, sticky dough. You could add toppings but I stayed with the simple cheese pizza recipe published in the magazine.


The dough was made a day ahead and it took about 15 minutes. Bread flour, salt, and yeast were stirred together. Warm water was added and mixed until incorporated. The sticky, wet dough was kneaded by hand in the bowl for about a minute. The dough was pressed into a greased 9-inch round cake pan, covered with plastic wrap, and refrigerated.


About 22 hours later the dough was removed from the refrigerator and allowed to rest at room temperature for half an hour. It was pressed into a 12" cast iron skillet that had been coated with olive oil. The skillet was covered with plastic wrap and the dough left to rise. While the dough was rising,  the sauce was made. Canned whole tomatoes were drained, then crushed by hand and placed in a food processor with some olive oil, salt, garlic, sugar, oregano, and red pepper flakes (about half the recipe amount). The mixture was processed until smooth. After the dough had risen the sauce was spread on top. A wall of shredded Monterey jack was made around the edge of the pan. Shredded fresh mozzarella was sprinkled over the pizza which was then baked at 400°. The almost finished pizza was moved to the stove top where it was cooked to finish browning the crust. It took about three hours from when the dough was removed from the refrigerator until it was served.


This is good pizza, definitely worth making again. The crust was crispy with a light, airy crumb. The sauce and cheese did not dominate the flavor, the crust was the star of the pizza. The frico, the rim of fried cheese around the rim, was okay but not an essential part of the meal. (And looking at the photos, perhaps I didn't press the Montery Jack cheese high enough above the dough.) The pizza was good the second night though it was not as crispy as when fresh. Using the skillet made handling the dough and pizza easier than rolling it out and transferring it to a pizza stone to bake.

Saturday, March 21, 2020

Recipe Notes: Country-style Potato-Leek Soup with Kielbasa

5 March 2020

Recipe from All Time Best Soups, America's Test Kitchen, 2016, p. 96; also available online.


Earlier this year we had some homemade soup that included leeks. This reminded me of just how much I enjoy leeks in soup so I looked for a leek soup recipe, and this is what I found. One of the variations of this simple recipe was to add kielbasa, which we enjoy, so I added it to provide a more complete soup.

This recipe uses a lot of leeks! You start with 4-5 pounds of leeks and cut off the dark green parts, so there is a lot of waste, too. The white and light green parts of the leeks were cut in half lengthwise  and then into 1-inch thick slices. These were washed well and cooked in butter in a Dutch oven until tender. A tablespoon of flour was stirred into the leeks and cooked for a few minutes. Chicken broth, red potatoes (peeled and cut into eighths), and a bay leaf were added and simmered until the potatoes were almost tender. Eight ounces of kielbasa was cut into ½-inch thick slices which were  stirred into the soup The soup was then moved off heat and left to sit for 15 minutes before serving. This soup was easy to make with the biggest chore preparing the large pile of leeks. Total time was 80 minutes.


This is a very simple soup with leek providing the dominant flavor. Especially when it was freshly made, the flavor was very one-note; it was not a complex soup. As is common with soup, the flavor developed over time and the soup was better as a leftover than when freshly made. The kielbasa was a good addition though the slices were a little large and there were not enough of them, averaging about one piece of sausage per bowl of soup. It makes a lot of soup which we enjoyed for several weeks.

Friday, March 20, 2020

Recipe Notes: Yellow Sheet Cake

4 March 2020

Recipe from The Perfect Cake, America's Test Kitchen, 2018, p. 104; recipe also available online but for a layer cake.


Continuing my adventures with cake, I made my first yellow sheet cake. This is not a lemon cake, so what makes it yellow? How is it different from, say, a white cake? I found an article online that does a pretty good job of explaining the differences between white cake, yellow cake, and vanilla cake. Now I know, which is a good thing.


The cake was easy to make and took only 75 minutes between starting and taking the finished cake  out of the oven. It does use a lot of bowls, though. The dry ingredients—cake flour, sugar, baking powder, baking soda, and salt—were whisked together in a bowl. In a second bowl (a  large measuring cup to facilitate pouring) the wet ingredients—buttermilk, egg yolks, melted butter, vegetable oil, and vanilla—were whisked together. Egg whites were added to the bowl of a stand mixer with some cream of tarter then whipped, with some sugar, to form stiff peaks. The whipped egg whites were transferred to a bowl (that makes four, if you're counting) and the dry ingredients were poured into the mixer bowl. This was mixed on low speed and the wet ingredients were slowly added.  The beaten egg whites were gently folded into the batter and this was put into a greased 13x9" pan and baked at 325°. The cooled cake was frosted with vanilla frosting made by beating butter, cream, vanilla, and salt with confectioners' sugar.


This was a good cake, certainly worth making again. It had a rich flavor, slightly suggestive of a custard, a tight crumb, and good moistness. Traditionally yellow cake is served with a chocolate frosting and that would be a good choice for this recipe, as was the smooth, light frosting that I used. I slightly overheat the eggs making them harder to fold into the batter, something to watch out for next time,

Thursday, March 19, 2020

Recipe Notes: Rustic Dinner Rolls

3 February 2020

Recipe from Bread Illustrated, America's Test Kitchen,  2016, p. 128; also available online


I like to have dinner rolls in the freezer, just to have on hand to add to the dinner menu when needed. With just two of us it's not practical to make them whenever we want them, but fortunately breads freeze well and thaw out quickly. I like soft, fluffy rolls but it is good to have some choices and variety so I was looking forward to trying these rustic dinner rolls. This recipe was featured on the America's Test Kitchen TV show in 2010 though the directions in the cookbook recipe are slightly different.


Some interesting techniques were used to achieve the chewy crumb and crispy crust. Bread flour, whole wheat flour, and yeast were whisked together in a stand-mixer bowl. With the mixer running using the dough hook, a mixture of water and honey was slowly added to form the high-hydration dough. After combining the ingredients the dough was covered with plastic wrap and left to rest for 15 minutes. Salt was then added and the dough mixed for 5 minutes followed by 1-2 minutes of kneading at a higher mixer speed. The dough was transferred to a greased bowl where it rose until doubled in volume, about 1 hour. The dough was then folded over on itself four times, with a 90° turn of the bowl between each fold, and left to rise for another 30 minutes. This process was repeated once more. The risen dough was turned out onto a well-floured counter and cut into two pieces. These were stretched into 16-inch logs which were each cut into 8 pieces. The pieces were placed into two greased 9-inch cake pans, covered, and set aside to rise until doubled in volume. They were misted with water and baked at 500° for 10 minutes. The partially baked rolls were  removed from the oven, cooled slightly, then pulled apart and placed on a baking sheet. This was returned to a 400° oven and baked until the rolls were deep golden brown all over. Total time, excluding cooling, was 4 hours 45 minutes, much of it hands off.


These are good rolls and worth making again. They have a nice crisp crust, chewy crumb with large holes, and a pleasant yeasty flavor. They keep reasonably well though, of course, losing some of the crispness of the crust. Watching the online video helped with the shaping process, which was easy enough but the visuals helped.


Tuesday, March 17, 2020

Recipe Notes: Mustardy Apple Butter-Glazed Pork Chops

28 January 2020

Recipe from Cook's Illustrated, January 2020


I do like pork chops but it seems like it has been several years since I have cooked them. I can think of several reasons for this. It can be difficult to get chops the right thickness at the store, the pre-packaged ones are usually much too thin. This leads to overcooked, dry, tough chops that are not good to eat. A good glaze can also add a lot to the success of the dish and would be key to a successful recipe. The promise of a flavorful glaze and a technique that did not overcook the chops in this new recipe from Cook's Illustrated was thus very appealing.


I used the "for Two" version of this recipe from the Cook's Illustrated website which uses two, rather than four, pork chops. These were 1¼-inch thick, center cut boneless pork chops, a little thicker than specified in the recipe. They were custom cut for me at Whole Foods and weighed about 8 ounces each. The glaze was made by whisking together apple butter, maple syrup, Dijon mustard, soy sauce, and cider vinegar. I ordered the apple butter online, in part so I would have the brand recommended in the recipe due to its desirable consistency. The chops were seasoned with salt, brushed with glaze, and roasted, on a wire rack set in a sheet pan at 275° for 47 minutes to reach an internal temperature of 135°. The pan was removed from the oven, more glaze was applied, and the chops were then cooked under the broiler for 3 minutes. Total prep time is about 10 minutes and the total time about an hour.


These slow-roasted, glazed pork chops were very good, tender, and juicy. The glaze was mildly spicy from the mustard and apple butter and it complemented the pork very well. We thought the dish could have used a little more glaze than specified in the recipe. This is a recipe worth using again. Now, what do I do with all of this apple butter?

Monday, March 16, 2020

Recipe Notes: Chewy Brownies

22 January 2020

Recipe from The Perfect Cookie, America's Test Kitchen, 2017, p. 245; also available online.


I've tried numerous recipes for brownies but I am always up to try a new one. When one of the recipes in the recently published America's Test Kitchen Top 20 recipe list was for brownies I knew I had to try it, especially since it had been a while since I had made brownies. This recipe came from the season 11 of ATK in 2011. Maybe this will be THE brownie recipe.


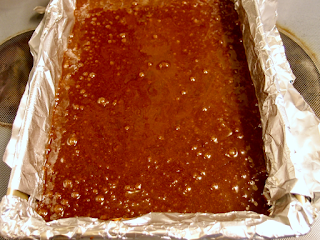
The brownies were easy to make with all of the mixing done by hand. Dutch-processed cocoa powder and espresso powder were dissolved in boiling water. (The espresso was listed as optional in the recipe and I used half of the suggested amount.) Chopped unsweetened chocolate was whisked in until melted. Vegetable oil and melted butter were whisked in followed by eggs, egg yolks, vanilla, and sugar. Next, all-purpose flour and salt were folded into the batter. To provide a final hit of chocolate, chunks of bittersweet chocolate were added. The batter was baked in a 13x9-inch baking dish lined with an aluminum foil sling. Total time was a little over an hour not counting cooling.


These are good brownies, it is easy to understand why they are so popular with ATK readers. They have a nice, chewy texture and good chocolate flavor. The chunks of bittersweet chocolate provide bonus chocolate flavor that provides pleasant surprises distributed randomly throughout the brownie. My batter seemed to have more bubbles in it than seen in the TV show or cookbook, but this didn't detract from the flavor or texture. The brownies take about the same time to prepare as a batch of cookies. The cookbook includes a variation with a chocolate frosting that might be worth trying.