Thursday, December 31, 2020

15-Minute Pantry Tomato Soup

 20 December 2020

Recipe from The Food Lab, W. W. Norton, 2015, p. 208


I started reading this huge book recently and when I was thinking of making some tomato soup I skipped ahead and found the recipe. It was advertised to be quick and not require any special ingredients, so well worth trying. I have tried several other tomato soup recipes and am curious how this one will compare.


A finely diced onion was cooked in butter in a sauce pan to soften the onion. Red pepper flakes (about 1⁄16 of a teaspoon) and dried oregano were added and cooked until fragrant. Flour was added and cooked followed by canned whole tomatoes with their juice, and milk. This was brought to a boil then simmered for just 3 minutes. The tomatoes were mashed roughly with a potato masher and an immersion blender was used to purée the soup. It was seasoned with salt and pepper and enhanced with the addition of some bourbon. Total time was about 30 minutes.


Unfortunately, doing a side-by-side comparison of soups made using different recipes is not practical, so I can't say with any confidence if this soup was better or worse than others I have made. My impression is that it was okay but not a great soup. Nonetheless I would like to make it again, using better quality tomatoes (I used a store-brand organic tomato) and the blender to purée instead of the immersion blender. I'm not totally sold on the bourbon, an optional ingredient, but perhaps it adds some complexity that I would miss. I also am interested in knowing how well the soup that is still in the freezer has fared.

Friday, December 11, 2020

Turkey Breast en Cocotte with Pan Gravy

 2 December 2020

Recipe from America's Test Kitchen


Turkey has been hard to find at the supermarket the last few years, except at Thanksgiving. So after getting home from our (safe) Thanksgiving trip we bought a half breast even though we just had several turkey meals. It was less than $1 a pound, so expectations were not high. Normally we'd look for something higher quality but it was a pretty good deal. And I had a Test Kitchen recipe for turkey breast from a 2018 episode of the TV show that I wanted to try. Its focus is on moist meat and gravy rather than magazine-cover good looks and crispy skin.


The recipe calls for a 6-7 pound whole, bone-in turkey breast; the half breast that we bough was from a larger bird, weighing 4.3 pounds. The ribs were cut off along with excess fat and skin. The breast was seasoned with salt and pepper then put into a Dutch oven with hot vegetable oil. To this was added chopped onion, celery, and carrot with crushed garlic cloves, fresh thyme, and bay. This was cooked, stirring the vegetables and turning the turkey, until all were well browned. A sheet of foil was put on the pot and this was covered with the lid. It went into a 250° oven until the turkey reached 160°. While the turkey rested the juices and vegetables were simmered until almost all of the liquid was gone. Flour was stirred in and cooked then a mixture of chicken and turkey broth (from concentrate) was added. This was cooked until the gravy was thickened and then was strained. Total time was 3¼ hours with over half of this being hands off while the turkey cooked in the oven.


As expected, the turkey was not great to look but the gravy was really good. The meat itself was dry and tough. I blame this mostly on the bargain turkey that we purchased rather than the recipe. The half breast barely fit into the Dutch oven making it a bit of a challenge to brown the vegetables and meat. This is a convenient, easy way to cook turkey breast for two and I would do it again, albeit with better quality meat and a smaller breast to start with. I would also skip the turkey stock and just use chicken as listed in the recipe. While the meat was dry and tough it was still good for leftovers where we could compensate for its shortcomings.

Thursday, November 19, 2020

Double-crust Chicken Pot Pie

 28 October 2020

Recipe from Cook's Country

I was inspired to try this recipe after seeing it demonstrated on a recent episode of the Cook's Country TV show. With the cooler autumn weather it seemed a perfect dinner. It looked like it would be fun to make, and though it could take some time none of the steps are difficult and none of the ingredients are exotic. We had a home-made chicken pot pie once before. It was made by our daughter and had just one crust and from my blog post it sounds like we really liked it.

First, the crust. The dough was made in the food processor. Sour cream and an egg were mixed in a bowl. All-purpose flour and salt were processed until combined. Unsalted butter, chilled and cut into ½-inch cubes, was added to the flour and pulsed until combined with the flour mixture. The sour cream mixture was added in two batches and processed. The nascent dough was kneaded by hand to bring the ingredients together then divided in half with each half formed into a smooth round disk. These disks were placed in the refrigerator for an hour to cool. After sitting on the counter for 10 minutes, each disk was rolled into a 12-inch circle. One of these was placed in a 9-inch pie pan and the other on a baking sheet. Both were covered with plastic wrap and returned to the refrigerator to chill.

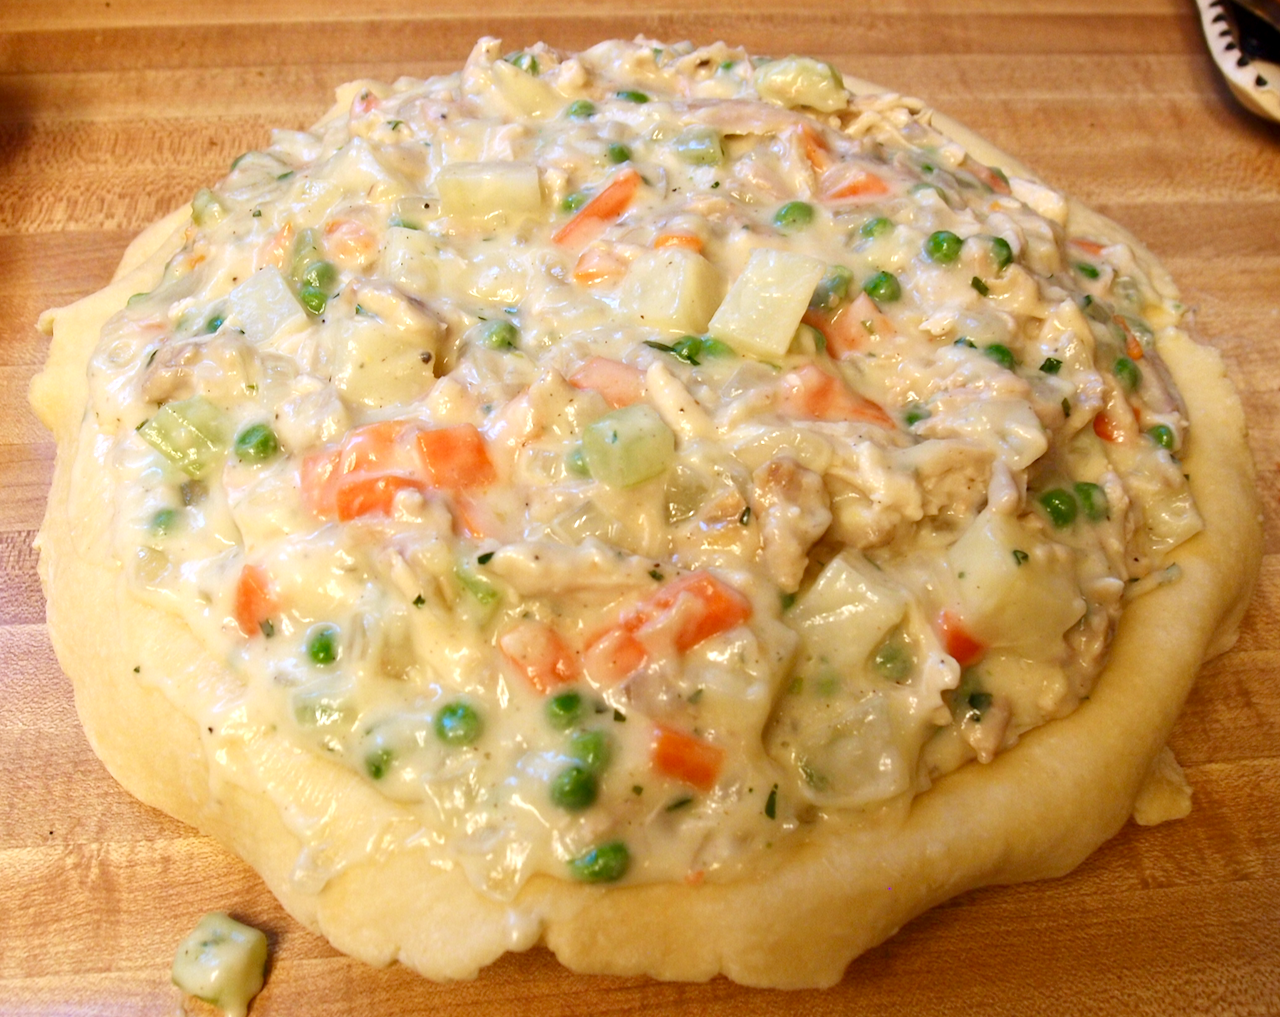
While the dough chilled for the second time, the filling was prepared. Butter was melted in a large saucepan and diced onions, carrots, and celery were added with salt and pepper. After the vegetables had softened flour was added and cooked until golden. Chicken broth and half-and-half were stirred in and brought to a boil. Diced potatoes were added and minced fresh tarragon (in place of thyme as specified in the recipe, because we had tarragon). This was simmered until the potatoes were tender. Off heat, frozen peas and shredded super-market roast chicken were added. The filling was added to the pie plate (it made a great mound), the top crust was placed, well, on top, and the two crusts crimped together.  Rather than fluting the edge I crimped it with a fork. Four slits were cut into the crust which was then brushed with an egg wash. The pie was placed on a rimmed baking sheet in a 450° oven for about 20 minutes. The temperature was lowered to 375° and the pie baked until it was deep golden brown. After cooling for 45 minutes it could be served. Total time was about 4½ hours but this includes time for chilling the dough, baking, and cooling, so the hands-on time was significantly less.

I had several concerns about this recipe. Would the bottom crust be soggy? Would the crust hold up in leftovers? Would the pie be sliceable or would the filling be runny? I am happy to report that none of these problems occurred. The crust was crispy, top and bottom, and never got soggy, even with leftovers. The over-stuffed pie didn't boil over and the rich, creamy filling stayed together when it was sliced and served. It was everything you could hope for in a cool-weather meal: lots of chicken and vegetables in a thick,  creamy sauce. The tarragon worked well, too, as a substitute for the thyme. The effort needed to make this pot pie was worthwhile and it is worth making again.


Friday, November 13, 2020

Black and White Cookies

 23 October 2020

Recipe from The Perfect Cookie, America's Test Kitchen, 2017, p. 237; recipe also available online.


In Central New York (CNY), where I grew up, people are familiar with half-moon cookies. While similar in appearance, the two cookies are apparently different, though the similar appearance can lead to confusion. I didn't eat much of either growing up as my mom didn't make them and you could only get them from the little bakery in town, Lynch's. My youngest sibling remembers my mom making these regularly, though, and I did have one from a bakery at a family reunion. As a CNY, or NYC, classic, I had to try making them.


There are two phases to making these cookies: making the cookies and making/applying the glazes. Making the cookies was straightforward. Dry ingredients—AP flour, baking powder, baking soda, and salt—were whisked together in a bowl. Sugar and butter were beaten in a stand mixer until fluffy. Eggs and vanilla were mixed in. The flour mixture was added in three additions alternating with the addition of sour cream. The dough was dropped onto sheet pans using a #16 disher (about ¼ cup) and baked. This produced 10 large cookies and took about 45 minutes. After the cookies cooled the glaze was made and applied, this took about an hour. The glaze was made by whisking confectioners' sugar with whole milk, corn syrup, vanilla, and salt. (Sifting the large amount of confectioners' sugar took some time and made a bit of a mess.) This was divided in half and Dutch-processed cocoa and milk were whisked into one half. Using an offset spatula, half of each cookie was covered with the vanilla glaze, on the flat side. These were refrigerated for 15 minutes to set the glaze, then the other half was covered with the chocolate glaze. 


I have been enjoying these cookies and will make them again. The glaze is little sweet for my taste but that isn't stopping me. The cookies are tender and cakey. They keep well in the freezer and at room temperature. I cut these large cookies in half when I have one so maybe next time I'll try making them smaller. Of course, I will need to try the CNY recipe for half-moon cookies, too. 

November 2024
I made these again with a few changes:
  • I made them smaller, using a #30 dishes rather than #16. 
  • I made 24 cookies. They baked for 14 minutes.
  • I did not sift the confectionery sugar or the cocoa. The glaze seems to be fine nonetheless.