Thursday, December 31, 2020

15-Minute Pantry Tomato Soup

 20 December 2020

Recipe from The Food Lab, W. W. Norton, 2015, p. 208


I started reading this huge book recently and when I was thinking of making some tomato soup I skipped ahead and found the recipe. It was advertised to be quick and not require any special ingredients, so well worth trying. I have tried several other tomato soup recipes and am curious how this one will compare.


A finely diced onion was cooked in butter in a sauce pan to soften the onion. Red pepper flakes (about 1⁄16 of a teaspoon) and dried oregano were added and cooked until fragrant. Flour was added and cooked followed by canned whole tomatoes with their juice, and milk. This was brought to a boil then simmered for just 3 minutes. The tomatoes were mashed roughly with a potato masher and an immersion blender was used to purée the soup. It was seasoned with salt and pepper and enhanced with the addition of some bourbon. Total time was about 30 minutes.


Unfortunately, doing a side-by-side comparison of soups made using different recipes is not practical, so I can't say with any confidence if this soup was better or worse than others I have made. My impression is that it was okay but not a great soup. Nonetheless I would like to make it again, using better quality tomatoes (I used a store-brand organic tomato) and the blender to purée instead of the immersion blender. I'm not totally sold on the bourbon, an optional ingredient, but perhaps it adds some complexity that I would miss. I also am interested in knowing how well the soup that is still in the freezer has fared.

Friday, December 11, 2020

Turkey Breast en Cocotte with Pan Gravy

 2 December 2020

Recipe from America's Test Kitchen


Turkey has been hard to find at the supermarket the last few years, except at Thanksgiving. So after getting home from our (safe) Thanksgiving trip we bought a half breast even though we just had several turkey meals. It was less than $1 a pound, so expectations were not high. Normally we'd look for something higher quality but it was a pretty good deal. And I had a Test Kitchen recipe for turkey breast from a 2018 episode of the TV show that I wanted to try. Its focus is on moist meat and gravy rather than magazine-cover good looks and crispy skin.


The recipe calls for a 6-7 pound whole, bone-in turkey breast; the half breast that we bough was from a larger bird, weighing 4.3 pounds. The ribs were cut off along with excess fat and skin. The breast was seasoned with salt and pepper then put into a Dutch oven with hot vegetable oil. To this was added chopped onion, celery, and carrot with crushed garlic cloves, fresh thyme, and bay. This was cooked, stirring the vegetables and turning the turkey, until all were well browned. A sheet of foil was put on the pot and this was covered with the lid. It went into a 250° oven until the turkey reached 160°. While the turkey rested the juices and vegetables were simmered until almost all of the liquid was gone. Flour was stirred in and cooked then a mixture of chicken and turkey broth (from concentrate) was added. This was cooked until the gravy was thickened and then was strained. Total time was 3¼ hours with over half of this being hands off while the turkey cooked in the oven.


As expected, the turkey was not great to look but the gravy was really good. The meat itself was dry and tough. I blame this mostly on the bargain turkey that we purchased rather than the recipe. The half breast barely fit into the Dutch oven making it a bit of a challenge to brown the vegetables and meat. This is a convenient, easy way to cook turkey breast for two and I would do it again, albeit with better quality meat and a smaller breast to start with. I would also skip the turkey stock and just use chicken as listed in the recipe. While the meat was dry and tough it was still good for leftovers where we could compensate for its shortcomings.

Thursday, November 19, 2020

Double-crust Chicken Pot Pie

 28 October 2020

Recipe from Cook's Country

I was inspired to try this recipe after seeing it demonstrated on a recent episode of the Cook's Country TV show. With the cooler autumn weather it seemed a perfect dinner. It looked like it would be fun to make, and though it could take some time none of the steps are difficult and none of the ingredients are exotic. We had a home-made chicken pot pie once before. It was made by our daughter and had just one crust and from my blog post it sounds like we really liked it.

First, the crust. The dough was made in the food processor. Sour cream and an egg were mixed in a bowl. All-purpose flour and salt were processed until combined. Unsalted butter, chilled and cut into ½-inch cubes, was added to the flour and pulsed until combined with the flour mixture. The sour cream mixture was added in two batches and processed. The nascent dough was kneaded by hand to bring the ingredients together then divided in half with each half formed into a smooth round disk. These disks were placed in the refrigerator for an hour to cool. After sitting on the counter for 10 minutes, each disk was rolled into a 12-inch circle. One of these was placed in a 9-inch pie pan and the other on a baking sheet. Both were covered with plastic wrap and returned to the refrigerator to chill.

While the dough chilled for the second time, the filling was prepared. Butter was melted in a large saucepan and diced onions, carrots, and celery were added with salt and pepper. After the vegetables had softened flour was added and cooked until golden. Chicken broth and half-and-half were stirred in and brought to a boil. Diced potatoes were added and minced fresh tarragon (in place of thyme as specified in the recipe, because we had tarragon). This was simmered until the potatoes were tender. Off heat, frozen peas and shredded super-market roast chicken were added. The filling was added to the pie plate (it made a great mound), the top crust was placed, well, on top, and the two crusts crimped together.  Rather than fluting the edge I crimped it with a fork. Four slits were cut into the crust which was then brushed with an egg wash. The pie was placed on a rimmed baking sheet in a 450° oven for about 20 minutes. The temperature was lowered to 375° and the pie baked until it was deep golden brown. After cooling for 45 minutes it could be served. Total time was about 4½ hours but this includes time for chilling the dough, baking, and cooling, so the hands-on time was significantly less.

I had several concerns about this recipe. Would the bottom crust be soggy? Would the crust hold up in leftovers? Would the pie be sliceable or would the filling be runny? I am happy to report that none of these problems occurred. The crust was crispy, top and bottom, and never got soggy, even with leftovers. The over-stuffed pie didn't boil over and the rich, creamy filling stayed together when it was sliced and served. It was everything you could hope for in a cool-weather meal: lots of chicken and vegetables in a thick,  creamy sauce. The tarragon worked well, too, as a substitute for the thyme. The effort needed to make this pot pie was worthwhile and it is worth making again.


Friday, November 13, 2020

Black and White Cookies

 23 October 2020

Recipe from The Perfect Cookie, America's Test Kitchen, 2017, p. 237; recipe also available online.


In Central New York (CNY), where I grew up, people are familiar with half-moon cookies. While similar in appearance, the two cookies are apparently different, though the similar appearance can lead to confusion. I didn't eat much of either growing up as my mom didn't make them and you could only get them from the little bakery in town, Lynch's. My youngest sibling remembers my mom making these regularly, though, and I did have one from a bakery at a family reunion. As a CNY, or NYC, classic, I had to try making them.


There are two phases to making these cookies: making the cookies and making/applying the glazes. Making the cookies was straightforward. Dry ingredients—AP flour, baking powder, baking soda, and salt—were whisked together in a bowl. Sugar and butter were beaten in a stand mixer until fluffy. Eggs and vanilla were mixed in. The flour mixture was added in three additions alternating with the addition of sour cream. The dough was dropped onto sheet pans using a #16 disher (about ¼ cup) and baked. This produced 10 large cookies and took about 45 minutes. After the cookies cooled the glaze was made and applied, this took about an hour. The glaze was made by whisking confectioners' sugar with whole milk, corn syrup, vanilla, and salt. (Sifting the large amount of confectioners' sugar took some time and made a bit of a mess.) This was divided in half and Dutch-processed cocoa and milk were whisked into one half. Using an offset spatula, half of each cookie was covered with the vanilla glaze, on the flat side. These were refrigerated for 15 minutes to set the glaze, then the other half was covered with the chocolate glaze. 


I have been enjoying these cookies and will make them again. The glaze is little sweet for my taste but that isn't stopping me. The cookies are tender and cakey. They keep well in the freezer and at room temperature. I cut these large cookies in half when I have one so maybe next time I'll try making them smaller. Of course, I will need to try the CNY recipe for half-moon cookies, too. 

Friday, November 6, 2020

Chicken with Vinegar

 19 October 2020

Recipe from Cook's Illustrated, September 2020


This was new to me, poulet au vinaigre, a simple, traditional French dish. The name is somewhat off-putting, suggesting you are making pickled chicken. But, fortunately, that is now what this is though the sauce does include vinegar. To find out just how simple and tangy and good this chicken is, or isn't, you have to make it.


I used the "for two" recipe from the Cook's Illustrated website which cooks 4 rather than 8 bone-in, skin-on chicken thighs, enough for us to have two meals. The chicken was patted dry with paper towels, seasoned, and both sides were browned in vegetable oil in an oven-proof skillet. The chicken was transferred to a plate and most of the fat was poured from the skillet. The skillet was placed over medium heat. Minced shallot and sliced garlic were added and cooked. To this was added chicken broth, dry white wine, and red wine vinegar. After bringing the mixture to a simmer the chicken was added, skin side up, and the skillet was placed in a 325° oven. About 30 minutes later the chicken had reached 195° and was removed from the oven. It was placed on a serving plate and the skillet returned to the stove over high heat. Tomato paste was whisked into the liquid which was cooked until thickened and reduced. Off heat, butter and minced fresh tarragon where whisked into the sauce which was poured over the chicken pieces for serving. Total preparation time was 75 minutes, about 30 minutes hands off.


This is a dish we will make again. It is simple and fast enough to make on a weekday night. The sauce was beautiful, just a little tangy with freshness from the herbs. The braised chicken was tender and juicy and the leftovers were good, too.

Saturday, October 31, 2020

Crumpets

 1 October 2020

Recipe from Cook's Illustrated, March 2020


What is more British than crumpets? Not being British, I can't remember ever eating a crumpet. I am much more familiar with, ironically, English muffins, which are similar. Both are made with a yeasted batter that is cooked on the stovetop. This recipe in a recent magazine provided an opportunity to try making these at home, and then eating them.


The technique used to cook these is easy but unique, and a little persnickety, and it took a few tries to figure it out. Fortunately the recipe makes three large crumpets so there was an opportunity to practice. All-purpose flour, cake flour, yeast, baking powder, and salt were whisked together in an 8-cup measuring cup. Warm water was added and the mixture whisked until smooth. It was covered and set aside to rise until doubled. Then, an 8-inch nonstick skillet was prepared by heating over low heat with a little oil. Some additional warm water was whisked into the batter. The heat under the skillet was increased to medium for one minute and the oil was wiped out leaving a thin film. One third of the batter was poured into the skillet and cooked for 45 seconds on high heat. The heat was reduced to medium low and the crumpet cooked until the edges were set. Off heat a flat spatula is used to lift any uncooked batter off the top of the crumpet to expose the holes. (Unusual, to say the least.) The crumpet was flipped over and cooked on high heat until the second side was lightly browned. The process was repeated with the second and third thirds of the batter. The large crumpets, after cooling, were cut into four wedges each yielding a total of 12 crumpets. Total time was about 80 minutes with 45 minutes of that hands off.


I enjoyed having the crumpets for breakfast over the next few weeks. They were toasted on a very high setting and then festooned with butter and jam or peanut butter. They test a little like the interior of English muffins, soft and yeasty. They kept well in the freezer. I don't know how they compare to other crumpets, but they do compare favorably with English muffins. I don't know that I will make them at home again, I do like my store-bought English muffins, but I am eager to try crumpets from the supermarket or a restaurant when I next get a chance to see how they compare.\

Saturday, September 26, 2020

Rustic Italian Bread

 14-15 September 2020

Recipe from Cook's Illustrated, January 2003


I enjoy the Italian bread made from a recipe in Bread Illustrated. So when I learned the Test Kitchen had  another recipe for Rustic Italian Bread I thought it was worth trying. One of the biggest differences is the use of a biga. A biga is similar to a sourdough starter, but it uses bread yeast instead of wild yeast and it is made just the day before baking and is fermented in the refrigerator. Will the longer preparation time be worthwhile?


The biga was made with bread flour, yeast, and water. These were kneaded in a stand mixer then placed in a covered bowl in the refrigerator, the process taking just 10 minutes. About 25 hours later, the biga was removed from the refrigerator. While it sat at room temperature, the dough was made by mixing bread flour, yeast, and water in the stand mixer. It was allowed to rest for 20 minutes at which time salt and the biga were added. The dough was kneaded for about 5 minutes, then transferred to a covered bowl, and left to rise for about 1 hour. It was then uncovered and the dough folded over on itself. The folding was repeated after the dough rose for another hour after which the dough rose for 1 final hour. I used a large measuring bowl, as I usually do when rising dough, but it would have been easier to fold the dough in a wider bowl. The dough was then shaped, dusted with flour, and left to rise about 1 hour. It was baked in a 500° oven on a baking stone, using the bottom of a baking sheet as a peel, after being spritzed with water. After 10 minutes baking the temperature was reduced to 400°. Total time, excluding cooling, was about 6 hours, but most of that was hands off.


The finished bread is very good with a chewy, yet tender crumb and thin crust. The flavor reminded me of a no-knead bread. However, the loaf was very big and an odd shape, not convenient for making sandwiches. When it rose it spread out rather than rising uniformly leading to a wide, low loaf. The crust was overdone in places and had some of it had separated from the crumb. The crumb was open, with large holes, also not ideal for sandwiches. Since sandwiches is what I use most bread for I will probably stick with the classic Italian bread and make no-knead bread when I went a good flavored, crusty bread as a side dish.


Friday, September 25, 2020

Smashed Burgers

 10 September 2020

Recipe from Cook's Illustrated, July 2020


I guess it was a few years ago when smashed burgers seemed to be all the rage. You could order them at restaurants and new fast food restaurants specializing in smashed burgers started to appear. I get why these could be appealing, by smashing the hamburger patty you maximize the amount of crust that develops with all of the flavor that entails. But could these be made at home? Could it be adapted to the slider-sized burgers that we eat? Would I want to make them at home rather than using my current cooking technique? This recent recipe (more a cooking technique than a list of ingredients)  provided a chance to find out.


To make two burgers, the recipe specified 8 ounces of 80% ground beef from the supermarket. We prefer smaller burgers and smaller buns, so I used what I had on hand: 6 ounces of chuck that I had ground myself. The beef was divided into four equally-sized balls. A cast iron skillet was heated for 5 minutes over medium-low heat and lightly oiled. The burner was then turned to high. When the oil began to smoke, two balls were placed in the skillet then smashed using a small sauce pan whose bottom had been wrapped in aluminum foil. The patties, which were 3½-4-inches in diameter, were seasoned and cooked until most of the pink was gone. A metal spatula was used to scrape the patty from the skillet and flip it over where it cooked for less than a minute. This was repeated with the other two balls. Each pair of patties were put onto buns with a slice of swiss cheese between them and served. 

Despite anticipating smoke this preparation did succeed in setting off smoke alarms, both downstairs and upstairs. We found the burgers to be overcooked and over salted; it was difficult to judge when to flip the patties and the cast iron skillet did not provide even heat so the patties were unevenly cooked. The patties did fit the slider buns. I'm glad I tried this technique, and even though the issues I had are easily solved, I suspect this was a one-time thing.  I will return to using my usual cooking technique that creates juicy burgers with a nice crust, thank you very much.

Tuesday, September 1, 2020

Recipe Notes: Grilled Chicken

26 August 2020

Recipe from Cook's Illustrated, May 2020; also available online.


Cook's Illustrated has published recipes recently for grilled chicken thighs and grilled drumsticks. Now they have published a recipe for grilled chicken breasts. White meat is more challenging to cook as it is easy to overcook it leading to dry, stringy meat. The thigh and drumstick recipes worked well, how will this recipe for breasts work?

Add caption

I halved the amount of chicken from the recipe, two breasts totaling 1.1 pounds, rather than four breasts in the recipe. I didn't halve the quantities for the brinerade which was made by mixing water, fish sauce, honey salt, and pepper. The breasts were pounded to ½-inch thick and covered in the brinerade in a zipper bag. The chicken was placed in the refrigerator for half an hour. While the chicken rested the grill was heated and the burners cleaned. The chicken was removed from the brinerade, the excess was allowed to drip off, and the chicken was tossed with vegetable oil. The breasts were placed on an oiled cooking grate and cooked until dark grill marks develop. It was then turned and cooked to an internal temperature of 160°. After a 5-minute rest it was ready to eat. Total time was 55 minutes.


The chicken came out very well. It was juicy, tender, and flavorful and had no tendency to stick to the grill while it cooked. It was good left over, too, as we had it in a salad and a sandwich. I wished I had bought more chicken just to have the leftovers which have many tasty and quick uses. But given how quick it was to prepare there's no reason not to make it again.

Tuesday, August 25, 2020

Recipe Notes: Provençal Soup

 5 August 2020

Recipe from Cook's Illustrated All Time Best Soups, America's Test Kitchen, 2016, p. 90; recipe also available online.


It is odd to be making soup in the summer. I chose to do so to provide some added variety for lunch after seeing the recipe demonstrated on a recent America's Test Kitchen. Summer, though, may be the best time to make this vegetarian vegetable soup so you can get all of the fresh ingredients that the recipe demands. The soup is similar to Minestrone but it differs in the addition of pistou, which is similar to pesto, just before serving.


Most of the time making this soup is spent preparing the vegetables. First, the pistou was made by processing fresh basil leaves, Parmesan cheese, olive oil, and garlic to form a smooth paste. This was set aside. Leek, celery, carrot, and salt were cooked in olive oil in a Dutch oven until softened. Minced garlic was added and cooked until fragrant. Water and vegetable broth (I used a broth made from concentrate) were added and brought to a simmer. Pasta (tubetti rigati) was added and cooked until slightly softened then green beans were added. After 5 minutes canned navy beans, with the canning liquid, were added followed by zucchini (seeded) and tomato (also seeded). The soup was simmered until the vegetables were cooked. A dollop of pistou was stirred into each serving bowl just before serving. Total time was 85 minutes of which 45 was preparing vegetables.


The soup was good, but not great. To me the strongest flavor in the broth was garlic, I was disappointed to not notice much flavor from the basil in the pistou. It was not a heavy soup which gained points for it as a summer soup. The broth improved in flavor over time though the vegetable colors faded. I don't expect to make this again, though I might have liked it more if it had been made with a chicken broth instead of vegetable.

Monday, August 24, 2020

Recipe Notes: Snickerdoodles

 5 August 2020

Recipe from The Perfect Cookie, America's Test Kitchen, 2017, p. 53; recipe also available online.


What a great name for a cookie! Even though snickerdoodles are popular in New England, near which I grew up, I don't recall ever having them as a kid. It was only after moving to California and getting married that I eventually had some made by Diane's grandmother, who was born in Montana and lived in Washington. I was also surprised to find I had not written a blog entry about them. I'm sure I have made them but apparently I didn't write anything. Until today.


Making these cookies uses standard cookie techniques, with a couple of twists. First, half of the fat comes from vegetable shortening rather than butter. Second, the recipe includes cream of tarter and no baking powder, just baking soda. The dry ingredients—AP flour, cream of tarter, baking soda, and salt—were whisked together in a bowl. Using a stand mixer, shortening and butter were creamed with sugar. Several eggs were added, one at a time with the mixer running, followed by the flour mixture. A #30 disher was used to make balls of dough approximately two tablespoons each. These were rolled in cinnamon sugar and baked at 375° until the edges were just set. The cookies cooled for 10 minutes on the baking sheet before being moved to a cooling rack. The recipe made 27 cookies and, except for cooling, took 50 minutes to finish.


These are good cookies. The have a soft interior, crispy edges, and a distinctive crinkly top. They are slightly tangy from the acidic cream of tarter and this is complemented by the spicy cinnamon coating. 

Wednesday, August 19, 2020

Recipe Notes: Skillet Pizza

 31 July 2020

Recipe from Bread Illustrated, America's Test Kitchen, 2016, p. 78.


I have enjoyed making pizza lately. The previous recipe I tried created a great pizza but the dough fermented for three days in the refrigerator and was baked on a stone in a very hot oven. It was worth waiting, but sometimes you want to get it over and done with in one day and still enjoy a good pizza. This recipe let's you do that and it is reminiscent of a recent cast-iron skillet pizza recipe I tried. But, using this quicker recipe, how is the pizza?

The sauce was made in the food processor: canned whole tomatoes, oil, garlic, vinegar, oregano, salt, and pepper were processed until smooth. The mixture was topped off with juice from the canned tomatoes to a total volume of two cups, enough for four pizzas. Half of this was frozen for later use.


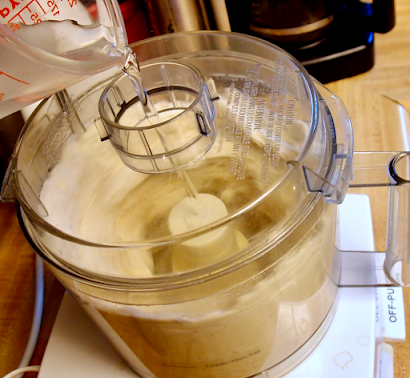
The dough was also made in the food processor. Bread flour, yeast, and salt were processed to combine. With the processor running, olive oil was slowly added, then water, and processed until a rough ball forms. The dough was kneaded briefly by hand and formed into a ball. Half of the dough was put into the refrigerator for the next day and half was left to rise until doubled.  It was then pressed into an 11-inch circle and placed into a 12-inch skillet that had been prepared with 2 tablespoons olive oil. One-half cup of the sauce was spread on the dough and it was topped with 4-ounces of fresh mozzarella slices. The skillet was placed on a burner over high heat and cooked until the pizza was slightly puffy and the bottom had started to brown. The skillet was then transferred to a 500° oven and cooked until the pizza was done, about 10 minutes. It was topped with chopped fresh basil and served. Total time was about 3½ hours, much of it hands off.

The second night the dough was removed from the refrigerator and left to warm at room temperature for 30 minutes. It was then shaped and prepared as on the first day. The dough was a little stiffer then for the first pizza but it was easy to press and roll out to the right size. Total time for the second night was 50 minutes. 


For a relatively short time in the kitchen this is a pretty good homemade pizza. It's not as good as the thin crust pizza where the dough that rises for three days in the refrigerator and then is baked on a very hot stone in a very hot oven. But for the effort involved this is a pretty good way to go.

Friday, August 14, 2020

Recipe Notes: Fudgy Brownies (a.k.a. Chewy, Fudgy, Triple Chocolate Brownies)

 28 July 2020

Recipe from The Perfect Cookie, America's Test Kitchen, 2017, p. 243; also available online.


I have made brownies using many different recipes and I've written about many of them here. They vary in the depth of chocolate flavor and the texture, from cakey and light in flavor to fudgy and dark. The brownies in this recipe fall in the latter category. The recipe was presented on the America's Test Kitchen TV show back in 2002.


The preparation was straightforward. A mixture of bittersweet and unsweetened chocolate was microwaved carefully, adding butter after the chocolates had started to soften and melt. until the chocolate and butter were totally melted. Dutched cocoa (natural cocoa would be okay, too) was whisked into the melted chocolate. In a large bowl, sugar, eggs, vanilla, and salt were whisked together until smooth. The slightly cooled chocolate mixture was whisked into the egg mixture. A.P. flour was stirred into gently until incorporated. The batter was poured into an 8x8-inch baking pan that had been prepared with a greased foil sling and baked for about 35 minutes at 350°. Total time, exclusive of cooling, was about 75 minutes.


As promised, these brownies are fudgy with a thin crispy crust and a lot of chocolate flavor. They were easy to make and didn't take a lot of time. I wish I could tell you how they compare to all of the other recipes I have tried, but they are good to eat. It would be nice to do a side-by-side comparison but that's just not practical. Maybe ATK could prepare brownies and do a taste test, that would fun and useful. They wouldn't have any trouble recruiting tasters.

Sunday, August 9, 2020

Recipe Notes: No Churn Ice Cream

30 June 2020

Recipes from August 2019 Cook's Country for Dark Chocolate and Vanilla


I was intrigued when I learned you could make ice cream at home without an ice cream churn. We have had churns, both hand crank and electric, but the few times we used them the results were mot spectacular. I'd like to try again some day but I would need a new churn to do that. Or do I? This recipe uses a blender instead of a churn. But does it make good ice cream?


I made both dark chocolate and vanilla ice creams using this method. (Cook's Country has recipes for other flavors, too.) The recipes and methods were the same for the two flavors except for the added flavoring. Heavy cream was added to a blender and processed to form stiff peaks. Next, sweetened condensed milk, flavorings, whole milk, light corn syrup, sugar, and salt were added. This mixture was processed to combine the ingredients. The cream mixture was poured into a loaf pan and frozen. Total preparation time was just 20 minutes though it took over six hours for the mixture to freeze using a glass loaf pan.


There were some challenges in making this ice cream. It was hard to tell when the cream was whipped properly inside the blender jar, as a result I may have over-whipped it. I also discovered that our blender is probably not powerful enough for this recipe, it didn't form and the top layers did not seem to be mixing well mixed with those at the bottom. I did some mixing by hand after blending to address this issue and it didn't seem to affect the homogeneity of the final result. The no-churn ice cream is pretty good, especially given how easy it is to make. The consistency is good as is the flavor, though it was perhaps a bit on the sweet side. Having tried it, I don't expect to use this recipe on a regular basis. As easy as it is, the ice cream does not match commercial, premium ice creams. We don't eat a lot of ice cream so it makes sense to get the good stuff when we do.

Tuesday, June 30, 2020

Recipe Notes: Butter-Basted Fish with Garlic and Thyme

16 June 2020

Recipe from Cook's Illustrated, March 2020


If you watch cooking shows on TV or online you've no doubt seen chefs cooking food in a skillet, madly spooning hot oil or butter from the skillet over the food. While apparently a common restaurant cooking technique this is not often done in the home kitchen. The recent edition of Cook's Illustrated provided a recipe teaching this technique and I gave it a try.


I purchased a little a 0.6 pound wild Pacific Cod fillet, about 1-inch thick. (Finding fillets thick enough can be a challenge.) The fillet was cut into two portions, patted dry, and seasoned with salt and pepper. It was placed in skillet with hot oil and cooked on both sides over medium heat. Butter was added to the pan and when it had melted a large spoon was used to ladle hot butter over the fish, alternated with periods of cooking without basting. Several cycles of this led to an internal temperature of about 130° at which point garlic cloves and thyme sprigs were added to the pan. The basting/resting cycle continued until the temperature of the fish reached 140°. Total time was 25 minutes.

This was indeed a fun technique to try and a quick, easy way to cook fish. The smell that came out of the pan when the thyme and garlic were added to the hot butter was amazing, though I didn't detect that flavor in the finished fish. I made one major error by not using a nonstick skillet. Oops. My fish stuck to the pan and cooked unevenly and in the end was a little overdone. This is certainly a technique to try again, with the correct pan. I would be interested in learning how to adapt it to cook chicken or steak.

Thursday, May 28, 2020

Recipe Notes: Gingersnaps

19 May 2020

Recipe from The Perfect Cookie, America's Test Kitchen, 2017, p. 46; also available online


I have had store-bought gingersnaps a few times but not many home-made gingersnaps. I recall my daughter making this recipe once some years back. The closest I have made would be spice cookies, and I have made (and written about) several of those. As I slowly work my way through this cookbook I came to this recipe and knew it was time to try it out.


My rule of thumb for the time to make a batch of cookies is 60-90 minutes. This recipe takes longer because the dough rests in the refrigerator for an hour and because it makes more, smaller cookies. Flour, baking soda, and salt were whisked together in a small bowl. Butter was melted in a skillet and cooked until it just started to turn brown. It was poured into a large bowl to which ground ginger, cinnamon, cloves, pepper, and cayenne were added.  After a few minutes to cool, brown sugar, grated fresh ginger, and molasses were whisked into the butter mixture followed by egg and egg yolk. The flour mixture was stirred in, the bowl was covered, and refrigerated for about an hour. The dough was formed into balls, each 1 heaping teaspoon. These were rolled in granulated sugar and baked for about 25 minutes. I made 60 cookies (recipe yield is 80). With 50 minutes to make the dough, an hour to chill, and 70 minutes to shape and bake: three hours total time. 


These are good cookies. They are crispy with a good snap but are not teeth-shattering hard. This is true for both fresh cookies and after a few days. They freeze well. I would not have been surprised if they were a little soft as mine were larger than envisioned by the recipe writers. (Just how much is a "heaping teaspoon"?) They have good ginger flavor and a bit of late heat, probably from the peppers, but there was not too much spice even for my sensitive, heat-averse taste. These are worth making again.

Monday, May 25, 2020

Recipe Notes: Pan-seared Strip Steaks

12 May 2020

Recipe from Cook's Illustrated, March 2020


I have had mixed success cooking steak and have written about my trials and tribulations here several times. There have been enough challenges that I have shied away from cooking steak, either because the end result was poor or the mess and alarm, as in smoke alarm, didn't seem to justify the experience. A new technique in a recent Cook's Illustrated seemed to promise to solve these problems. Does it live up to its promise?


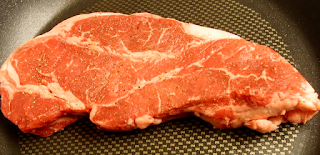
This new school method for cooking steak breaks with much conventional steak-searing convention. I started with a one-pound strip steak that was about 1¼-inches thick. The steak was patted dry, seasoned with pepper, and placed in a cold nonstick skillet, with no oil. The burner was turned on high. After two minutes the steak was flipped and cooked for another two minutes then flipped again. The heat was reduced to medium and the steak cooked, flipping every two minutes. A total of five flips was needed before the temperature of the steak reached 120°. After resting the steak was seasoned with salt and served. Total time was 15 minutes.


You're probably wondering, is that all there is to it? This method led to perfectly cooked steak with a good crust and medium-rare interior from edge to edge. Clean up was easy with the non-stick skillet and there was no splatter and no blaring smoke alarm. This technique removes any reasons I might have to not cook steaks, other than the cost of a quality cut of steak. As an option, the recipe suggests seasoning the steaks with salt and letting them rest for 45 minutes to 24 hours in advance and I might try that next time I have a hankering for a strip or rib-eye steak.