Tuesday, August 25, 2020

Recipe Notes: Provençal Soup

 5 August 2020

Recipe from Cook's Illustrated All Time Best Soups, America's Test Kitchen, 2016, p. 90; recipe also available online.


It is odd to be making soup in the summer. I chose to do so to provide some added variety for lunch after seeing the recipe demonstrated on a recent America's Test Kitchen. Summer, though, may be the best time to make this vegetarian vegetable soup so you can get all of the fresh ingredients that the recipe demands. The soup is similar to Minestrone but it differs in the addition of pistou, which is similar to pesto, just before serving.


Most of the time making this soup is spent preparing the vegetables. First, the pistou was made by processing fresh basil leaves, Parmesan cheese, olive oil, and garlic to form a smooth paste. This was set aside. Leek, celery, carrot, and salt were cooked in olive oil in a Dutch oven until softened. Minced garlic was added and cooked until fragrant. Water and vegetable broth (I used a broth made from concentrate) were added and brought to a simmer. Pasta (tubetti rigati) was added and cooked until slightly softened then green beans were added. After 5 minutes canned navy beans, with the canning liquid, were added followed by zucchini (seeded) and tomato (also seeded). The soup was simmered until the vegetables were cooked. A dollop of pistou was stirred into each serving bowl just before serving. Total time was 85 minutes of which 45 was preparing vegetables.


The soup was good, but not great. To me the strongest flavor in the broth was garlic, I was disappointed to not notice much flavor from the basil in the pistou. It was not a heavy soup which gained points for it as a summer soup. The broth improved in flavor over time though the vegetable colors faded. I don't expect to make this again, though I might have liked it more if it had been made with a chicken broth instead of vegetable.

Monday, August 24, 2020

Recipe Notes: Snickerdoodles

 5 August 2020

Recipe from The Perfect Cookie, America's Test Kitchen, 2017, p. 53; recipe also available online.


What a great name for a cookie! Even though snickerdoodles are popular in New England, near which I grew up, I don't recall ever having them as a kid. It was only after moving to California and getting married that I eventually had some made by Diane's grandmother, who was born in Montana and lived in Washington. I was also surprised to find I had not written a blog entry about them. I'm sure I have made them but apparently I didn't write anything. Until today.


Making these cookies uses standard cookie techniques, with a couple of twists. First, half of the fat comes from vegetable shortening rather than butter. Second, the recipe includes cream of tarter and no baking powder, just baking soda. The dry ingredients—AP flour, cream of tarter, baking soda, and salt—were whisked together in a bowl. Using a stand mixer, shortening and butter were creamed with sugar. Several eggs were added, one at a time with the mixer running, followed by the flour mixture. A #30 disher was used to make balls of dough approximately two tablespoons each. These were rolled in cinnamon sugar and baked at 375° until the edges were just set. The cookies cooled for 10 minutes on the baking sheet before being moved to a cooling rack. The recipe made 27 cookies and, except for cooling, took 50 minutes to finish.


These are good cookies. The have a soft interior, crispy edges, and a distinctive crinkly top. They are slightly tangy from the acidic cream of tarter and this is complemented by the spicy cinnamon coating. 

Wednesday, August 19, 2020

Recipe Notes: Skillet Pizza

 31 July 2020

Recipe from Bread Illustrated, America's Test Kitchen, 2016, p. 78.


I have enjoyed making pizza lately. The previous recipe I tried created a great pizza but the dough fermented for three days in the refrigerator and was baked on a stone in a very hot oven. It was worth waiting, but sometimes you want to get it over and done with in one day and still enjoy a good pizza. This recipe let's you do that and it is reminiscent of a recent cast-iron skillet pizza recipe I tried. But, using this quicker recipe, how is the pizza?

The sauce was made in the food processor: canned whole tomatoes, oil, garlic, vinegar, oregano, salt, and pepper were processed until smooth. The mixture was topped off with juice from the canned tomatoes to a total volume of two cups, enough for four pizzas. Half of this was frozen for later use.


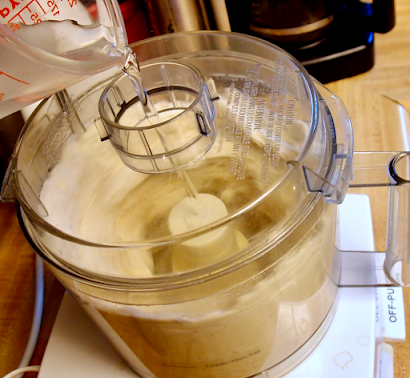
The dough was also made in the food processor. Bread flour, yeast, and salt were processed to combine. With the processor running, olive oil was slowly added, then water, and processed until a rough ball forms. The dough was kneaded briefly by hand and formed into a ball. Half of the dough was put into the refrigerator for the next day and half was left to rise until doubled.  It was then pressed into an 11-inch circle and placed into a 12-inch skillet that had been prepared with 2 tablespoons olive oil. One-half cup of the sauce was spread on the dough and it was topped with 4-ounces of fresh mozzarella slices. The skillet was placed on a burner over high heat and cooked until the pizza was slightly puffy and the bottom had started to brown. The skillet was then transferred to a 500° oven and cooked until the pizza was done, about 10 minutes. It was topped with chopped fresh basil and served. Total time was about 3½ hours, much of it hands off.

The second night the dough was removed from the refrigerator and left to warm at room temperature for 30 minutes. It was then shaped and prepared as on the first day. The dough was a little stiffer then for the first pizza but it was easy to press and roll out to the right size. Total time for the second night was 50 minutes. 


For a relatively short time in the kitchen this is a pretty good homemade pizza. It's not as good as the thin crust pizza where the dough that rises for three days in the refrigerator and then is baked on a very hot stone in a very hot oven. But for the effort involved this is a pretty good way to go.

Friday, August 14, 2020

Recipe Notes: Fudgy Brownies (a.k.a. Chewy, Fudgy, Triple Chocolate Brownies)

 28 July 2020

Recipe from The Perfect Cookie, America's Test Kitchen, 2017, p. 243; also available online.


I have made brownies using many different recipes and I've written about many of them here. They vary in the depth of chocolate flavor and the texture, from cakey and light in flavor to fudgy and dark. The brownies in this recipe fall in the latter category. The recipe was presented on the America's Test Kitchen TV show back in 2002.


The preparation was straightforward. A mixture of bittersweet and unsweetened chocolate was microwaved carefully, adding butter after the chocolates had started to soften and melt. until the chocolate and butter were totally melted. Dutched cocoa (natural cocoa would be okay, too) was whisked into the melted chocolate. In a large bowl, sugar, eggs, vanilla, and salt were whisked together until smooth. The slightly cooled chocolate mixture was whisked into the egg mixture. A.P. flour was stirred into gently until incorporated. The batter was poured into an 8x8-inch baking pan that had been prepared with a greased foil sling and baked for about 35 minutes at 350°. Total time, exclusive of cooling, was about 75 minutes.


As promised, these brownies are fudgy with a thin crispy crust and a lot of chocolate flavor. They were easy to make and didn't take a lot of time. I wish I could tell you how they compare to all of the other recipes I have tried, but they are good to eat. It would be nice to do a side-by-side comparison but that's just not practical. Maybe ATK could prepare brownies and do a taste test, that would fun and useful. They wouldn't have any trouble recruiting tasters.

Sunday, August 9, 2020

Recipe Notes: No Churn Ice Cream

30 June 2020

Recipes from August 2019 Cook's Country for Dark Chocolate and Vanilla


I was intrigued when I learned you could make ice cream at home without an ice cream churn. We have had churns, both hand crank and electric, but the few times we used them the results were mot spectacular. I'd like to try again some day but I would need a new churn to do that. Or do I? This recipe uses a blender instead of a churn. But does it make good ice cream?


I made both dark chocolate and vanilla ice creams using this method. (Cook's Country has recipes for other flavors, too.) The recipes and methods were the same for the two flavors except for the added flavoring. Heavy cream was added to a blender and processed to form stiff peaks. Next, sweetened condensed milk, flavorings, whole milk, light corn syrup, sugar, and salt were added. This mixture was processed to combine the ingredients. The cream mixture was poured into a loaf pan and frozen. Total preparation time was just 20 minutes though it took over six hours for the mixture to freeze using a glass loaf pan.


There were some challenges in making this ice cream. It was hard to tell when the cream was whipped properly inside the blender jar, as a result I may have over-whipped it. I also discovered that our blender is probably not powerful enough for this recipe, it didn't form and the top layers did not seem to be mixing well mixed with those at the bottom. I did some mixing by hand after blending to address this issue and it didn't seem to affect the homogeneity of the final result. The no-churn ice cream is pretty good, especially given how easy it is to make. The consistency is good as is the flavor, though it was perhaps a bit on the sweet side. Having tried it, I don't expect to use this recipe on a regular basis. As easy as it is, the ice cream does not match commercial, premium ice creams. We don't eat a lot of ice cream so it makes sense to get the good stuff when we do.