Wednesday, June 30, 2021

Detroit-Style Pizza

 18 May 2021

Recipe from Cook's Country, August 2017


There are many different styles of pizza so I guess it shouldn't have been a surprise when I learned of another from an episode of Cook's Country on TV. It's a pan pizza baked in a square pan as created at the Detroit restaurant Buddy's Rendezvous in 1946. Some changes had to be made to the original recipe so it could be made at home anywhere in the country. I won't be able to compare it to the original but I can try it to see if it is any good.


A 13x9-inch baking pan was sprayed with vegetable oil then olive oil was brushed on the bottom and sides. All-purpose flour, yeast, and sugar were whisked together in the bowl of a stand mixer. With the mixer running, room-temperature water (I always use bottled water for bread dough) was added and mixed until no dry flour remained. The dough was covered and let stand for about 10 minutes. Then, salt was added and the dough was kneaded in the mixer. It was turned out onto a counter and kneaded to form a ball of dough, adding bench flour as needed so the sticky dough could be handled. The dough was placed in the prepared baking pan and allowed to rest for about 15 minutes before being stretched to fill the pan. The dough rose until roughly triple in volume, about 2½ hours. Meanwhile, the sauce was created by mixing canned crushed tomatoes, olive oil, chopped fresh basil, minced garlic, dried oregano, dried basil, sugar, pepper, and salt. I couldn't find a small can of crushed tomatoes so used "petite-cut tomatoes" that I mashed and drained. When the dough was ready it was covered with grated Monterey Jack cheese then the sauce was applied in three stripes. The pizza was baked in a 500° oven for about 15 minutes, cooled for 5, then served. Total time, mostly hands off, was just under 3½ hours.


This is good pizza and worth having regularly. The crust is crispy and chewy and the sauce is flavorful and bright and there is just the right amount. We had two dinners and a lunch from this pizza. The amount of time invested to create it is reasonable since most of it is hands off. It is good left over, reheated in a covered skilled to crisp up the crust and melt the cheese.

Tuesday, June 29, 2021

Anzac Biscuits

 5 May 2021

Recipe from Cook's Illustrated, January 2021


These oatmeal cookies were developed around the time of World War I for the Australian and New Zealand Army Corps (ANZAC). They include one ingredient that is not common in American supermarkets and which I had to buy online: golden syrup. It was suggested that I substitute light corn syrup but I wanted to taste these with the genuine caramel flavor that the golden syrup provides. 


All-purpose flour was whisked together with sugar and salt. Rolled oats and sweetened flaked coconut were stirred into the flour mixture. Butter and the golden syrup, which has a consistency like honey at room temperature, were heated in a sauce pan until the mixture began to bubble. Off heat, a mixture of baking soda and hot water was stirred into the golden syrup mixture causing it to foam and bubble. The flour mixture was added and stirred to combine. (Making cookie dough in a sauce pan is a novel feature of this recipe.) The recipe specifies use of a #40 portioning scoop to create 24 balls of dough on two sheet pans. Not having a #40 scoop I used a #30 but didn't fill it all the way. Each ball was flattened into a 2-inch disk with a fork before baking the biscuits at 350°. Total time was 55 minutes, consistent with my 1-hour rule-of-thumb for the time needed to make a batch of cookies.


These are good cookies, errrr, biscuits. When fresh they have a crispy edge and a very chewy center with a rich caramel flavor which complements the coconut and oat pieces. Their orange-ish color is unlike any other biscuits that I have made. I plan to make these again, at least until I have used up my supply of Lyle's golden syrup. We'll see, then, if I decide to buy more golden syrup to make even more.

Sunday, June 27, 2021

Cream of Celery Soup

 13 April 2021

Recipe from Cook's Country, June 2013


Once a month we get small box of organic produce, a CSA (Consumer Supported Agriculture) box. Recently our box contained not one but two bunches of celery. What are the two of us going to do with all of that celery? I did some hunting and found a recipe for celery soup that would use close to half of it. This would be a good start on making good use of this bounty.


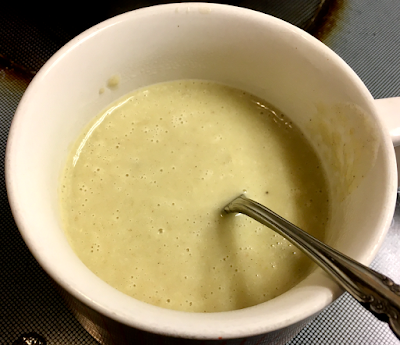
Twelve chopped celery ribs, sliced potato, chopped onions, sugar, dried sage, salt, and pepper were added to melted butter in a Dutch oven and cooked to soften the celery and onion. Flour was added and cooked for a minute followed by chicken broth and a bay leaf. The mixture was brought to a boil then simmered until the potatoes were tender. The bay leaf was removed and the soup was processed in a blender until smooth. It was returned to the the stove,  cream was added and brought to a simmer. After seasoning with salt and pepper it was ready to serve. The recipe's estimated time of one hour was not even close as it took me two hours to make. I spent close to half an hour just preparing the vegetables.


This is a good soup. It was creamy and smooth with a nice blend of flavors from celery, cream, and sage. Like tomato or split pea soup it is probably better as a side dish than as the main course of a dinner. Some of it was frozen which caused it to separate. It did not look appetizing in this state but after re-heating it was fine. I don't know if I'll make it again but it was certainly a good way to use excess celery.


Friday, June 25, 2021

Quick Chicken Cacciatore

 12 April 2021

Recipe from The America's Test Kitchen Quick Family Cookbook, America's Test Kitchen, 2012, p. 118.


It has been a while since we had chicken cacciatore. Searching through the blog didn't find much and since I didn't want a recipe that took a lot of time I checked the Quick Family Cookbook and found this recipe.


Quartered white mushrooms, chopped onion, olive oil, minced dried porcini mushrooms, and salt were cooked in a covered skillet over medium-high heat until the mushrooms had released most of their liquid. The cover was removed and cooking continued until the mushrooms were browned. Minced garlic and herbs de Provence were stirred in and cooked until fragrant. A little flour was stirred in and cooked for a minute followed with red wine and chicken broth which was whisked until smooth. Canned crushed tomatoes were added and simmered. Thin slices of boneless skinless chicken breast were added and simmered until the chicken was cooked and the sauce had thickened. It took a little over an hour to make the sauce which was then added to pasta to be served. We had it with both penne and farfalle. 


This was a good dish and worth having again. The chicken was tender and moist and the sauce was good with simple flavors. It would have been better if I had remembered to add the grated parmesan and chopped parsley just before serving. :-(  It was as good leftover as the first time, all that needed to be done was to cook some pasta, heat up some sauce, then toss them together. And add Parmesan and parsley ... don't forget that!

Tuesday, June 22, 2021

Sous Vide Turkey Confit

 17 April 2021

Recipe from Cook's Illustrated, November 2020


The title of an article in the November/December 2020 issue of Cook's Illustrated got my attention, "The Best Turkey You'll Ever Eat". I was tempted to make it except for the large quantity of expensive duck fat needed to confit the turkey. Confit is a cooking technique where meat is cured in salt then gently poached in fat, in this case duck fat. I was interested partly because I had never used this technique. Fortunately an alternative recipe was provided using sous vide cooking. It was still confit but instead of cooking the turkey in a Dutch oven filled with duck fat, it was cooked in sealed plastic bag immersed in a constant temperature bath with a much smaller amount of the expensive fat.


I halved the recipe, using one turkey leg (thigh and drumstick) instead of four thighs. Onions, thyme sprigs, salt, sugar, and pepper were finely chopped in a food processor. Some of this mixture was placed in the bottom of a baking dish, the turkey was placed on top, and the rest of the curing mixture was spread over the top of the turkey. The dish was wrapped in plastic wrap and placed in the refrigerator where it sat for four days. This step took 20 minutes to prepare.


The turkey drumstick and thigh were removed from the cure, rinsed well, and patted dry. Each was placed in a vacuum bag with duck fat, powdered garlic, and a bay leaf then vacuum sealed. These were lowered into a 158° water bath and cooked for about 20 hours. This step took 25 minutes to prepare.


Aluminum foil was crumpled, then un-crumpled, placed in a sheet pan, and topped with a wire rack. The cooked turkey was gently removed from the water bath, transferred to the wire rack, then roasted in a 500° oven until browned. After resting for 15 minutes it was served with a sauce made with some de-fatted stock from the sous vide bags mixed with apricot marmalade (I had no orange marmalade), mustard, lime zest, lime juice, salt, and cayenne. This step took 40 minutes. While it took over five days to complete this recipe, the hands on time was under 90 minutes. 


After all that time the resulting turkey was good. We enjoyed the flavor, it was tender but not very juicy.  The sauce was okay but probably would have been better with orange marmalade. However, in the end it was just not the same as roast turkey with gravy that we are accustomed to having from Thanksgiving dinners. It was fun and easy to make and included several new cooking techniques, which is a good thing. However, I don't expect to use this method again. It was not the best turkey I've ever eaten. The trick with the crumpled foil to catch grease and prevent it from moving around, though, is a keeper and I have used it several times since learning of it from this recipe.

Wednesday, June 2, 2021

Cast-Iron Skillet Chocolate Chip Cookie

 29 March 2021

Recipe from America's Test Kitchen


I don't remember where I came across this recipe. I do remember, though, that my mother occasionally made something like this, though I think she made it in a baking pan rather than a skillet. Since I enjoy chocolate chip cookies, making them more often than any other kind of cookie, I wanted to give this variation a try.


Over medium heat, butter was melted in a cast iron skillet until it was dark golden brown and had a nutty aroma. (It is hard to observe the color of the butter in the dark cast iron, but it seemed to come out okay.) The brown butter was poured into a mixing bowl and additional butter was added. Once the butter was all melted, brown sugar, granulated sugar, vanilla, and salt were whisked in. The mixture rested for a few minutes then was whisked again. This process, similar to that used in the recipe for Perfect Chocolate Chip Cookies, was repeated several times. A mixture of flour and baking soda was stirred into the butter mixture followed by chocolate chips. After wiping out the cast-iron skillet, the dough was added and baked until the cookie was golden brown. Total time was 70 minutes, excluding cooling, a typical time for making a batch of cookies.


It was very convenient to be making just one giant cookie, saving time in portioning the dough and baking multiple batches. Because of its size, this cookie is less crust and more crumb than chocolate chip cookies  of normal size. It tastes fine, though perhaps a little doughy, maybe under-baked in this instance. Because of this I think I will stick with normal sized cookies, but it was fun to make this one time.