Tuesday, December 19, 2017

Recipe Notes: December 2017

6 December 2017

Japanese Milk Bread

Recipe from Bread Illustrated, 2016, p.94


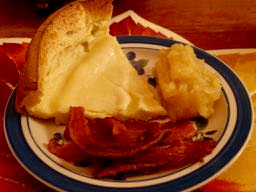
I have been trying different recipes for white sandwich bread over the last year or two. This is another, from the chapter on sandwich breads from the America's Test Kitchen book, Bread Illustrated. It uses a technique, tangzhong, that worked very well in the Test Kitchen's recipe for fluffy dinner rolls which I've written about already.


This bread took four hours to make, before cooling, but most of this time is hands off. The recipe includes two unique features. First is the use of tangzhong, a paste, with a consistency like pudding, made from flour and warm water. This incorporates additional water into the dough without making it difficult to shape leading to a more tender crumb. The shaping method is also special: the dough is rolled into a thin sheet and then rolled into two tight rolls that are then baked in a standard loaf pan. The dough bakes into tender, feathery sheets. The dough is enriched with milk, butter, and an egg.


This is good sandwich bread! For the time being, at least, this will be my go-to recipe for making a white sandwich bread. I will continue trying other recipes but I could happily stop here in my search. It has a great texture and flavor and keeps very well. It takes a little longer to make but the wait is worthwhile, especially since most of the waiting time is just that, waiting, rather than working. 


10 December 2017

Senate Navy Bean Soup

Recipe from Cook's Country, October 2014


I have long been searching for a good bean soup recipe, without notable success. I still buy Campbell's condensed bean with bacon soup, one of my favorites from childhood. I had read about Senate Navy Bean soup, and I had maybe even tried a version of it a long time ago. But I didn't think the Test Kitchen had a recipe until I am across this one recently.


The soup is quite simple with only a few ingredients. It took a little over two hours to prepare, not counting the time the beans were soaking, but much of this time is for the soup to simmer unattended.  Navy beans are hard to find so I used "small white beans" which, so far as I can tell, are very similar and maybe the same thing. These are soaked in salty water over night. In a Dutch oven, onion, celery, and salt are cooked in oil to soften the vegetables, some garlic is added, and this mixture is set aside. Water, ham hocks, and whole cloves are simmered for 45 minutes. Potatoes and the onion mixture are added and cooked until the potatoes are tender. The ham hocks are removed and the mixture in the Dutch oven is partially mashed with a potato masher. The meat is removed from the hocks and added into the soup. Finally, a little vinegar is added to the soup.


The final soup of good, not great but quite good. Diane had seconds, which is a good sign. Some of the meat was tough; I couldn't shred it with forks but had to use a knife to cut it. My initial impression was that it was salty but I think that was wrong. After some additional sampling I think I was fooled by the vinegar. The soup keeps well, which is good because there is a lot of it for just the two of us. It is worth making again.

17 December 2017

Spaghetti and Meatballs

Recipe from America's Test Kitchen, Season 2


It has been a while since we had a pasta dish and even longer since we had classic spaghetti and meatballs. We usually have spaghetti with a meat sauce or a marina sauce without meatballs. Our most recent spaghetti used a meatless meat sauce because our daughter and boyfriend, who are vegan, were visiting. I've only made meatballs a few times, so I went searching on the ATK web site for a recipe and chose one from many years ago.


According to the recipe it can be "on the table in under an hour". I didn't quite make it, I needed 75 minutes, but if I had started the pasta sooner it would have been close to an hour. There is nothing particularly complicated about the recipe. The meatballs are made by mixing together ground beef, a buttermilk/white bread panade (I used buttermilk that had been frozen), Parmesan cheese, parsley, egg yolk, garlic, salt, and pepper. I used 100% ground beef rather than the 3:1 beef:pork mixture, because what do you do with ¾-pound of leftover ground pork? I used a #24 disher to portion the meat mixture resulting in 13 meatballs. These were flat on one side and I rounded them off before putting them in a ¼-inch layer of hot oil to fry. The sauce is simple: crushed tomatoes, garlic, and basil plus the fond from the meatballs.


This recipe made for a nice dinner. Actually three nice dinners for the two of us. The meatballs are very tender with a lot of flavor. The sauce was good but, by design, very simple and with a good texture that clung to the pasta. I wasn't sure how tightly to pack "¼ cup grated Parmesan cheese" so that is a possible variable between my meatballs and what was intended. The recipe also did not specify how fatty the ground beef should be. The meatballs were perhaps a little too tender, they tended to fall apart. There was also the problem of discarding over 1½ cups of dirty frying oil. I would make this recipe again, though it would be nice if the meatballs held together a little better and if the sauce had more flavor.

Saturday, December 16, 2017

Recipe Notes: November 2017

1 November 2017

Muffin Tin Doughnuts

Recipe from June 2013 Cook's Country


I like doughnuts. Best of all are homemade donuts, still warm from the fryer, crispy on the outside, soft and warm on the inside. (I wrote about this combination last month.) However, making fried doughnuts is a bit of a chore and they don't keep particularly well. It doesn't take long for moisture to move from the inside to the crust, ruining that crispy exterior. So the promise of good doughnuts without the work of frying was too hard to pass up.


These doughnuts should be called muffins: they are made in a muffin tin and the batter is created using the same technique that is used to make muffins. In one bowl the dry ingredients—flour, sugar, cornstarch, baking powder, salt, and freshly grated nutmeg—are whisked together. In a second bowl the wet ingredients—buttermilk, melted butter, eggs—are whisked together. The wet ingredients are added to the dry and stirred until just combined. The batter is scooped into muffin tins and baked. The finished doughnuts are then painted with melted butter (this recipe uses two sticks of butter) and coated with cinnamon sugar. Very straightforward and from start to finish in just over one hour. When the cold buttermilk was added to the melted butter it partially solidified but this didn't seem to affect the finished product. I found that a #24 scoop was too small to portion the batter among the 12 cups so next time I need to use a larger one.


The resulting doughnuts are quite good. They have a crispy, crunch exterior though not as crispy as fried donuts. They keep well in the freezer and after thawing and a short spin in the microwave are almost as good as when fresh. The crumb is tasty with a nice hint of nutmeg, though perhaps the crumb is a little heavy. For a quick homemade doughnut, these are quite good and easy to make.

13 November 2017

Buttermilk Waffles

Recipe for Classic Buttermilk Waffles from America's Test Kitchen


The problem using recipes that include buttermilk is having a lot of leftover buttermilk. The smaller size container is one quart and recipes usually call for one cup or so of buttermilk. Finding myself in that situation I tried some buttermilk waffles using a recipe from season 2 of America's Test Kitchen. (It was fun watching video of the show from all those years ago and seeing the familiar faces but much younger.)


Making the batter was straightforward: the dry ingredients (AP flour, cornmeal, salt, baking soda) are mixed in one bowl, the liquid (egg yolk, melted butter, buttermilk) in another, and egg whites are beaten in a third. The liquid ingredients are mixed into the dry before the whipped egg whites are folded in. These are then baked on a waffle iron. 


The resulting waffles are OK, but not as good as the yeasted waffles that I enjoy. The batter is very thick which makes it difficult to spread on the waffle iron. The outside of the waffles is not as crispy  as I like and having three dirty bowls to wash was a little much. I will say that these waffles seemed to be better as leftovers, warmed up in a toaster, than the yeasted waffles are.

23 November 2017

Apple Pandowdy

Recipe from Cook's Country, October 2016


This is a variation on apple pie that I made for our Thanksgiving for two. It is a skillet pie and has only a top crust. Part way through baking the crust is pressed down into the apple juices. These flow over the top of the curst and caramelize during the latter part of baking. This is "dowdying".


It took about three hours to make this dessert, not all of the time was hands on. The dough is made with all butter and a little sour cream, using the food processor to cut the flour and butter together. After chilling it is rolled out and cut into squares. The filling is made in a skillet (I used a 10" nonstick skillet) with apples, brown sugar, cinnamon, and apple cider, among other ingredients. The squares of crust are shingled onto the filling in the skillet, brushed with an egg wash and sprinkled with cinnamon sugar, then baked. Part way through baking the pan is removed from the oven to dowdy the crust. 


Because it is a skillet pie the crust is much easier to make than with a conventional pie. It was a good skillet pie. We didn't eat it when it was still warm from the oven when it was probably at its best. The filling was well balanced, not too sweet and not too spicy. The crust, being just on the top, took a back seat to the filling but it was reasonably tender and also nicely seasoned. This is a good alternative to conventional apple pie.

23 November 2017

Roast Turkey Breast with Gravy

Recipe from Cook's Illustrated, November 2017


What do you do to have a traditional Thanksgiving dinner with only two people? Last year we roasted half of a turkey breast. This worked out well, despite missing dark meat. I made an all-purpose gravy which does not rely on any drippings from the meat. While is was passable it was not as good as gravy made with turkey rather than just vegetables and store-bought chicken broth. Thus it was exciting to see a new recipe this year for roast turkey breast and gravy. 


The recipe is for a whole turkey breast, including the back. I went to Whole Foods planning to buy that, but found they had half breasts and, separately, turkey backs. The half breast is a better size for us, and the back (which costs less than the breast) could be used for the gravy. The day before Thanksgiving I salted the turkey and put it in the refrigerator. I used the turkey back, following the recipe, to make turkey stock. This took about 1½ hours with browning the turkey and then simmering it with onion, carrots, celery, thyme sprigs, and a bay leaf. I cut the back in half and made the broth in a skillet. The finished broth was placed in the refrigerator with the turkey.


The next day, the turkey was placed in a skillet, brushed with butter and sprinkled with salt, then placed in a 325° oven to roast. When it reached 130° it was removed, the oven temperate was increased to 500°, and the turkey cooked to 160° The 3.2 pound half breast was done in under 90 minutes. While the turkey rested, the gravy was made. Flour was whisked into the drippings, then the pan was deglazed with some white wine. The turkey stock was added and the gravy simmered until thickened. Together it took about two hours to prepare the turkey and gravy.


More work went into preparing the gravy then roasting the turkey. But it was well worth it! The gravy was very good as was the turkey. Half a breast was just right for us, it made for a good meal plus a reasonable number of meals with the leftovers. I still miss having the dark meat, maybe someday I'll find a good recipe that solves this problem, too.

Wednesday, November 8, 2017

Recipe Notes: October 2017

1 October 2017

German Pancake

Recipe from Cook's Illustrated, May 2017


I'd not heard of German Pancakes until reading the article in Cook's Illustrated but they are similar to Dutch babies, which I have heard of but I don't remember eating. It seemed like a good thing to try as a part of "breakfast for dinner", a custardy concoction that reminded me of popovers or Yorkshire pudding.


The batter is simple to make: the dry ingredients (flour, sugar, lemon zest, salt, and ground nutmeg) are whisked together as are the wet ingredients (milk, eggs, vanilla extract). The wet ingredients are whisked into the dry in two portions creating a smooth batter.  Butter is melted in a skillet, the batter is added, and the skillet is placed in a cold oven then baked at 375° for about 35 minutes. The finished pancake is sprinkled with lemon juice and sugar and served warm.


The pancake rose spectacularly during baking, rising several inches above the edges of the skillet. I suspect the skillet I used was a little too small and this may have contributed to the rise. I used the "German Pancake for Two" recipe which resulted in four servings for us. I enjoyed the pancake with the contrasting crisp crust, custardy interior, and hints of lemon and nutmeg. Diane was unimpressed. I was very skeptical about how this would fare as a left over and we didn't eat the second half of the pancake. It was an interesting experiment but I doubt I will make it again.


16 October 2017

Creamy Tapioca Pudding

Recipe from June 2010 Cook's Country


I've made pudding from scratch several times and have always been surprised how simple it is to make. The result is so much better than pudding made from a mix and not that much more difficult. However I had never made tapioca pudding so I was happy to find this recipe on the America's Test Kitchen web site. (I still wonder where all the little tapioca balls come from :-). )


It took a little over half an hour to make the pudding and most of the time was hands off waiting for the mixture to heat. Most of the ingredients (milk, egg, sugars, salt, and Minute tapioca) and mixed and let to sit for five minutes. The mixture is brought to a boil, stirred for two minutes and taken off heat. Vanilla extract is added and the pudding is refrigerated before serving with whipped cream.


As promised, the pudding is creamy. It would be hard to say it is smooth, though, with all of the little tapioca balls throughout. These make for an interesting texture in contrast to more homogeneous puddings. Diane doesn't like it and I'm not sure exactly how I feel about it. I like smooth chocolate pudding better so I might not try this again, but I am happy to have made it this time. (And I sort of know about the little balls of starch, but not in any detail.)


21 October 2017

Mashed Butternut Squash

Recipe from October 2013 Cook's Country


For Thanksgiving dinner, my mom almost always served mashed butternut squash as a side dish. It was good, but I don't really know how she made it. I imagine it was very simple, prepared like mashed potatoes by boiling the squash until tender, then mash it with some butter and perhaps milk or cream. I searched the ATK web site and found a very different recipe and gave it a try.


This recipe has many more ingredients. The squash is peeled, seeded, and cut into one-inch pieces that are seasoned and roasted until tender. While the squash is roasting, apples and onion are cooked in butter. (I used Jazz apples, rather than Granny Smith, which I grated on a box grater.) Then garlic, cumin, coriander, cinnamon, and cayenne are added. When the squash is done this is added to the apple mixture with maple syrup and mashed.  Total time was about one hour and I halved the recipe.


We both liked this squash! It had a complex flavor. Warmth from the spices and sweetness from  apples and maple syrup complemented the earthy flavor of the squash very well. It keeps well, too. This is not your mother's mashed squash, but I think we'll be making this again, perhaps for Thanksgiving.


21 October 2017

Crispy Pan-Fried Chicken Cutlets

Recipe from September 2017 Cook's Illustrated


This recipe in a recent Cook's Illustrated looked very interesting. A simplified method for making fried chicken that promised a crispy exterior and that is easy to make, I knew I had to try this.


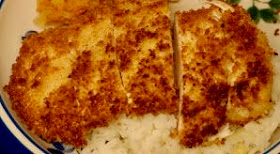
The recipe is indeed simple to execute. I purchased a package of three chicken breasts weighing 1.6 pounds. Each breast was cut in half horizontally then pounded so the thickness is uniform. These were dredged in an egg and salt mixture then coated with panko break crumbs that have been lightly crushed. They were then fried in a thin layer of oil. The whole process took 35 minutes and made enough fried chicken for three meals.


Simple yet yielding very good chicken. It was crispy on the outside and juicy on the inside ... I love almost anything that is crispy on the outside and juicy on the inside. The leftovers, reheated in a skillet, were good as well, not quite as crispy or quite as juicy, but still good. The recipe included several simple sauces but we had the chicken with no sauce.

Friday, September 29, 2017

Recipe Notes: September 2017

8 September 2017
Spaghetti with Meatless Meat Sauce

Recipe from Cook's Illustrated, May 2017


I was happy to see this recipe in a recent Cook's Illustrated. Since our daughter is vegan it is good to have some appropriate recipes available for when she visits. I didn't have to wait long to try this one as she spent a few days with us in early September.


I spent 75 minutes making the sauce, which I did a few days before it was served. Much of the "knife work" is done using the food processor, saving significant time. Finely chopped mushrooms are cooked in olive oil followed by finely chopped onions and tomato paste. A slurry of minced garlic in oil with red pepper flakes is added to bloom their flavors followed by canned crushed tomatoes and vegetable broth. (We make all of our broths using "Better Than Bouillon" concentrates.) Finally, drained, finely chopped chickpeas are added for a hearty texture and it is seasoned with salt, pepper, and fresh basil.


While for me it isn't a replacement for the several meat sauces in my repertoire, it's still a good dish to have for vegan visitors. Diane commented that people might not know it was meatless if they weren't told. It has the texture and much of the flavor of a meat sauce, but without the fat which provides both flavor and a certain mouth feel. The fat also tends to make the sauce feel heavy while the meatless sauce is lighter.

12 September 2017
Olive Oil Cake

Recipe from Cook's Illustrated, May 2017


The name of this cake sounds odd to me. Perhaps it is because I am not an experienced cake maker, but a cake made with olive oil? I wasn't sure how the strongly flavored oil would work in a dessert. However, the article made it sound good and I was encouraged seeing many (incredibly many) favorable comments about the cake online.


The cake was easy to make, taking just over an hour from when I started to removing it from the oven. The recipe has just three steps (though each step includes multiple substeps.) Whole eggs are whipped then sugar and lemon zest are added and the mixture is whipped some more. Next, the olive oil is slowly added and mixed until it is incorporated. A flour mixture (flour, baking powder, salt) is added in portions with milk until it is all mixed. The batter is poured into a springform pan and topped with sugar that forms a crackling crust; no icing needed.


The resulting cake is good! It has a subtle flavor of olives plus a subtle flavor from the lemon. The crumb is very moist and tender, similar to pound cake, and the sugar topping provides a nice textural contrast and some enjoyable sweetness. The cake keeps well at room temperature and was good both fresh and after a few days. I would enjoy some additional lemon flavor and so would add additional lemon zest to the batter and perhaps use a lemon-zest flavored sugar for the topping. This is a cake to make again.


14 September 2017
Whole Wheat Sandwich Bread

Recipe from Bread Illustrated, America's Test Kitchen, 2016, p. 290


In my continuing quest for better-than-white sandwich breads I had been looking forward to using this recipe. It was designed to maximize the flavor from whole wheat but retain the softer texture that is desirable in a simple sandwich bread. I have tried several recipes recently which substitute whole wheat flour for some of the white flour. This recipe has more whole wheat flour than most and takes extra steps to ensure the texture is correct despite this.


Beginning the evening before, create a "soaker" and a "sponge". The soaker consists of whole wheat flour, wheat germ, and milk; soaking them overnight softens the whole wheat bran which tends to weaken gluten otherwise. The soaker is bread flour, yeast, and water; letting this rise over night develops flavor. It took about 20 minutes to assemble these. I found the soaker to be very wet and added additional flour so I could knead it.

The next day the soaker is broken up and mixed with the sponge, butter, honey, yeast, oil, and salt then kneaded in a stand mixer. I added about ¼ cup of flour while kneading because the dough was too wet. It rises for 45 minutes (mine rose longer because I got tied up in a meeting) and is then shaped into two loaves. These rise and are baked. This whole process takes upward of five hours, though most of it is hands off.

After going through all of this, I am not sure if the extra work is worthwhile. The bread is good but I don't know that it is better enough than other whole wheat sandwich bread recipes to justify the time invested. Given the evidence for too much water in the soaker and the over-long first rise it might be worth trying this recipe again to see if it works out better given a second try.

17 September 2017
Turkey Meatloaf

Recipe from Cook's Illustrated, July 2017


I like meatloaf but I've never tried turkey meatloaf. I can remember using ground turkey just once, to make Sloppy Toms, a version of Sloppy Joes. As I recall they were quite good. The description for this recipe claims turkey would provide a lighter version of meatloaf. But there was more to creating the recipe than just substituting turkey for beef and pork.


It took about two hours to make the meatloaf, one hour to prepare and an hour in the oven, not counting the recommended twenty minutes rest when it is baked. Butter is melted in a skillet and a pinch of baking soda is added. (The onion softens more quickly with baking soda.) Chopped onion and salt are added and cooked until the onion starts to brown. The recipe calls for the addition of garlic and fresh thyme; I was unable to purchase fresh thyme and, lacking ground thyme, I added ½ teaspooon herbes de Provence. Finally, Worcestershire sauce is added and the mixture is poured into a bowl. Egg yolks and mustard are stirred into the cooled onion mixture. Finally, ground turkey, grated Parmesan cheese, oats, and parsley are added. This is mixed by hand and shaped into a loaf for baking. Half of a glaze, in this case ketchup-brown sugar, is put onto the loaf before baking with the rest brushed on about half way through. I misread the recipe and used rolled oats instead of quick oats (or chopped up rolled oats).


This is a very good meatloaf! It tastes good and lives up to the description of being lighter than a beef/pork meat loaf. I enjoyed the glaze but Diane did not love it. Cook's Illustrated also gives a recipe for an apricot-mustard glaze and I will have to try that next time I make this keeper of a meatloaf.

Update, December 2019: We tried the apricot-mustard glaze. It is okay, Diane liked it better than the ketchup glaze, I prefer ketchup.

18 September 2017
Apple Bundt Cake

Recipe from Cook's Illustrated, September 2017


I usually only make cake when I can share it with other people. Diane is not fond of cake which leaves just me to eat almost the whole thing ... it would be too much. Fortunately, this month I had two meetings where I could take cake. As it was almost Fall I wanted to try this apple cake from the current issue of Cook's Illustrated, even though we haven't had many cool, Fall days this year.


Assembling the ingredients is pretty standard: dry ingredients are mixed, wet ingredients are mixed separately, then stirred into the dry. To get a lot of apple flavor into the cake, however, several nonstandard steps are taken. First, the apples are grated rather than diced: grated apples are more evenly distributed through the cake and avoid the wet patches and holes in the cake that can be produced by larger pieces of fruit. Second, reduced apple cider is used in several ways. Four cups of cider (I used Martinelli apple juice) are boiled down in a skillet to just one cup. (This took about 25 minutes. I overdid it and added some juice back in to bring it up to 1 cup.)  The apple reduction is used to make a glaze, is added to the batter, and is poured onto the finished cake after baking. Preparation took about 40 minutes, baking 65 minutes, and the glaze was added after the cake had cooled. 


The cake is good: moist and tender with a lot of apple flavor and a hint of cinnamon and allspice. It kept well at room temperature and was popular at the meeting where I served it. I thought it had a bit of an off-flavor which I suspect came from the reduced apple juice. It wasn't bad and no one else commented on it, but I found it to be distracting. Perhaps it was caused by the over reduction or by the particular juice I used. If I were to make this again then perhaps using an unfiltered cider would be the way to go. The French Apple Cake from Cook's Illustrated provides an alternative.

24 September 2017
Cashew Chicken

Recipe from Cook's Country,  January 2009


This is an example of a recipe that I normally avoid because it requires rare ingredients. It's not that the ingredients themselves are rare, it's just that food that we cook rarely uses them. Thus, they sit in the cupboard, sometimes for years, after only having been used once. In this case it is mirin and sesame oil (I chose this over the more expensive toasted sesame oil). But I don't often make stir fry dishes and this is one that Diane, who normally avoids Chinese food, does like.


Instead of buying boneless, skinless chicken breasts I bought breasts with ribs and skins; these cost about half as much and removing the bones and skin is easy. After being cut up, the chicken is marinated for about 30 minutes in mirin, soy sauce, sesame oil, and cornstarch.  A sauce consisting of chicken broth, Worcestershire, mirin, soy sauce, sesame oil, and cornstarch is prepared and set aside. The chicken is stir fried in vegetable oil first, in two batches, then set aside. Next, snow peas are fried, then ginger, garlic, and pepper flakes are added. Water chestnuts and the broth mixture are added and cooked until thickened. Finally, the chicken is added and cooked until heated through. Cashews (which I did not toast as requested in the recipe) are added at the end. We had extra cashews to add when we served the leftovers. This dish took about 90 minutes to prepare including the time for marinating.


This is a good, but not great, version of cashew chicken. It has a strong, sharp flavor from the fresh ginger and soy. The chicken was very nicely cooked, juicy and tender.  When served as a leftover the sharp flavor of the ginger was less pronounce and the dish as a whole a more mellow. Now, what do we do with mirin and sesame oil?